You have the ability to enter patient information by bulk. This can save you lots of time from typing each patient one by one into the app. We use a spreadsheet to gather the patient information and you can fill this up from your computer for easier typing.
Download the spreadsheet template
- Open Doctor At Work (Plus) on your device.
- Go to Home > Settings > Import / Export
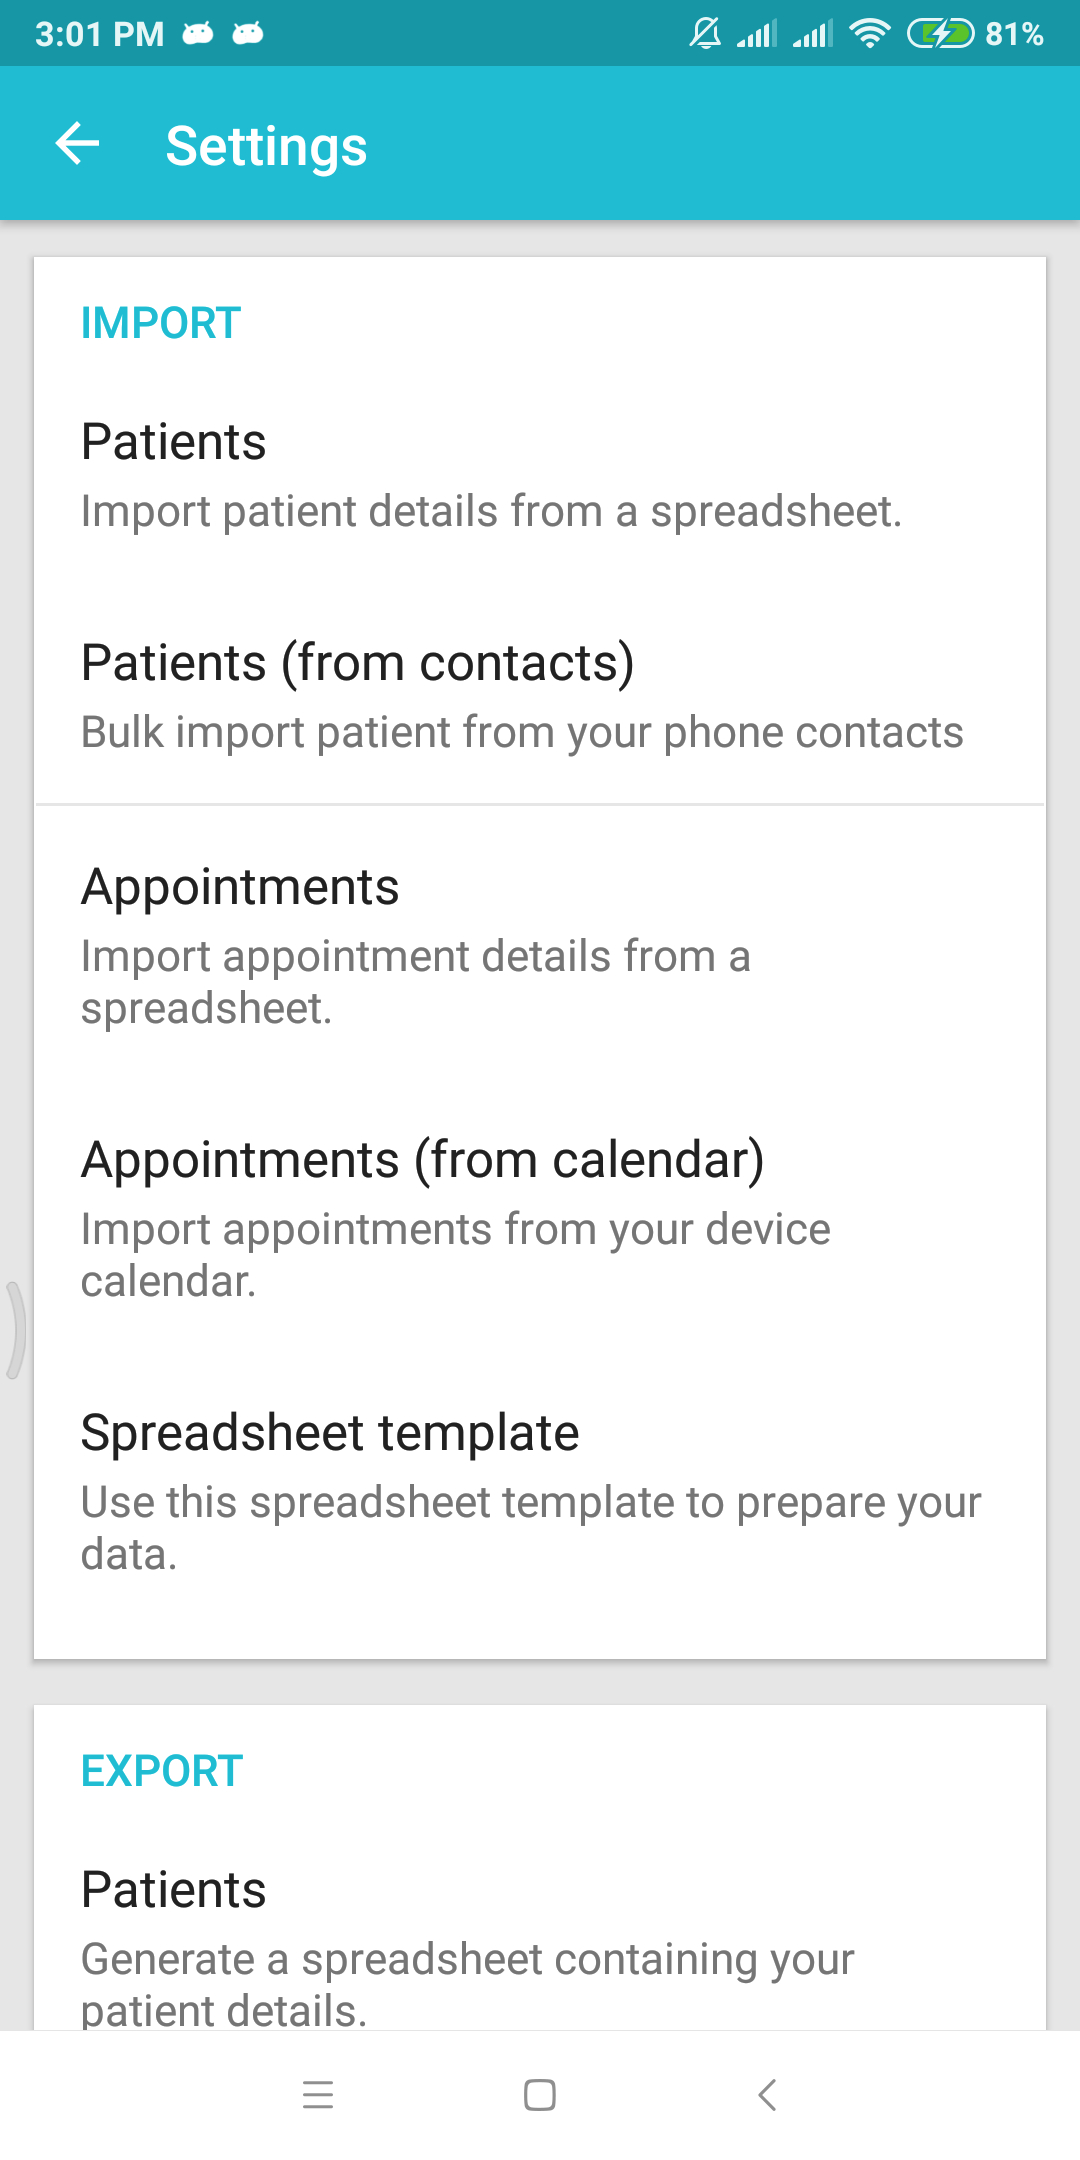
- On the Settings screen, tap on Import > Spreadsheet template > Import Patients > Done
- Your device may show you a list of apps that can send this template.
- Choose Google Drive if you see it on the list. This is the best way to move files between your device and computer.
- Choose Gmail from the list if you want it emailed to you.
- Open the template from your computer using Excel.
- If you used Google Drive, open drive from your computer and download the file.
- If you emailed it to yourself, open Gmail from your computer and download the file.
- The filename should be “patients_template.csv”
Fill up the spreadsheet template
This is how the template looks like when you open it.

The 1st row is the header. It helps describe the information underneath each column. It is also used to map the spreadsheet column to an actual patient field on the app. For example, “First name” maps to the patient’s first name in the app. This mapping will be done later when you import this file back to the app.
The 2nd row represents a “sample patient” record. You can use this as a starting point when entering your patients. Things to take note on this row are the dates (like date of birth and since) and gender.
Each patient should only occupy one row.
How you enter values on each column is explained below.
- Code – this is a way to identify your patient using your own IDs. If you have existing IDs for each of your patient that you want to keep, you can enter it here. Otherwise, it is perfectly fine to keep it blank too.
- First Name (mandatory) – this is the patient’s first name
- Last Name – this is the patient’s last name
- Age – this is the patient’s age
- Phone – the patient’s primary contact number
- Alternative Phone – the patient’s other contact number
- Referred By – the doctor or person who referred this patient to you
- Email – the patient’s email
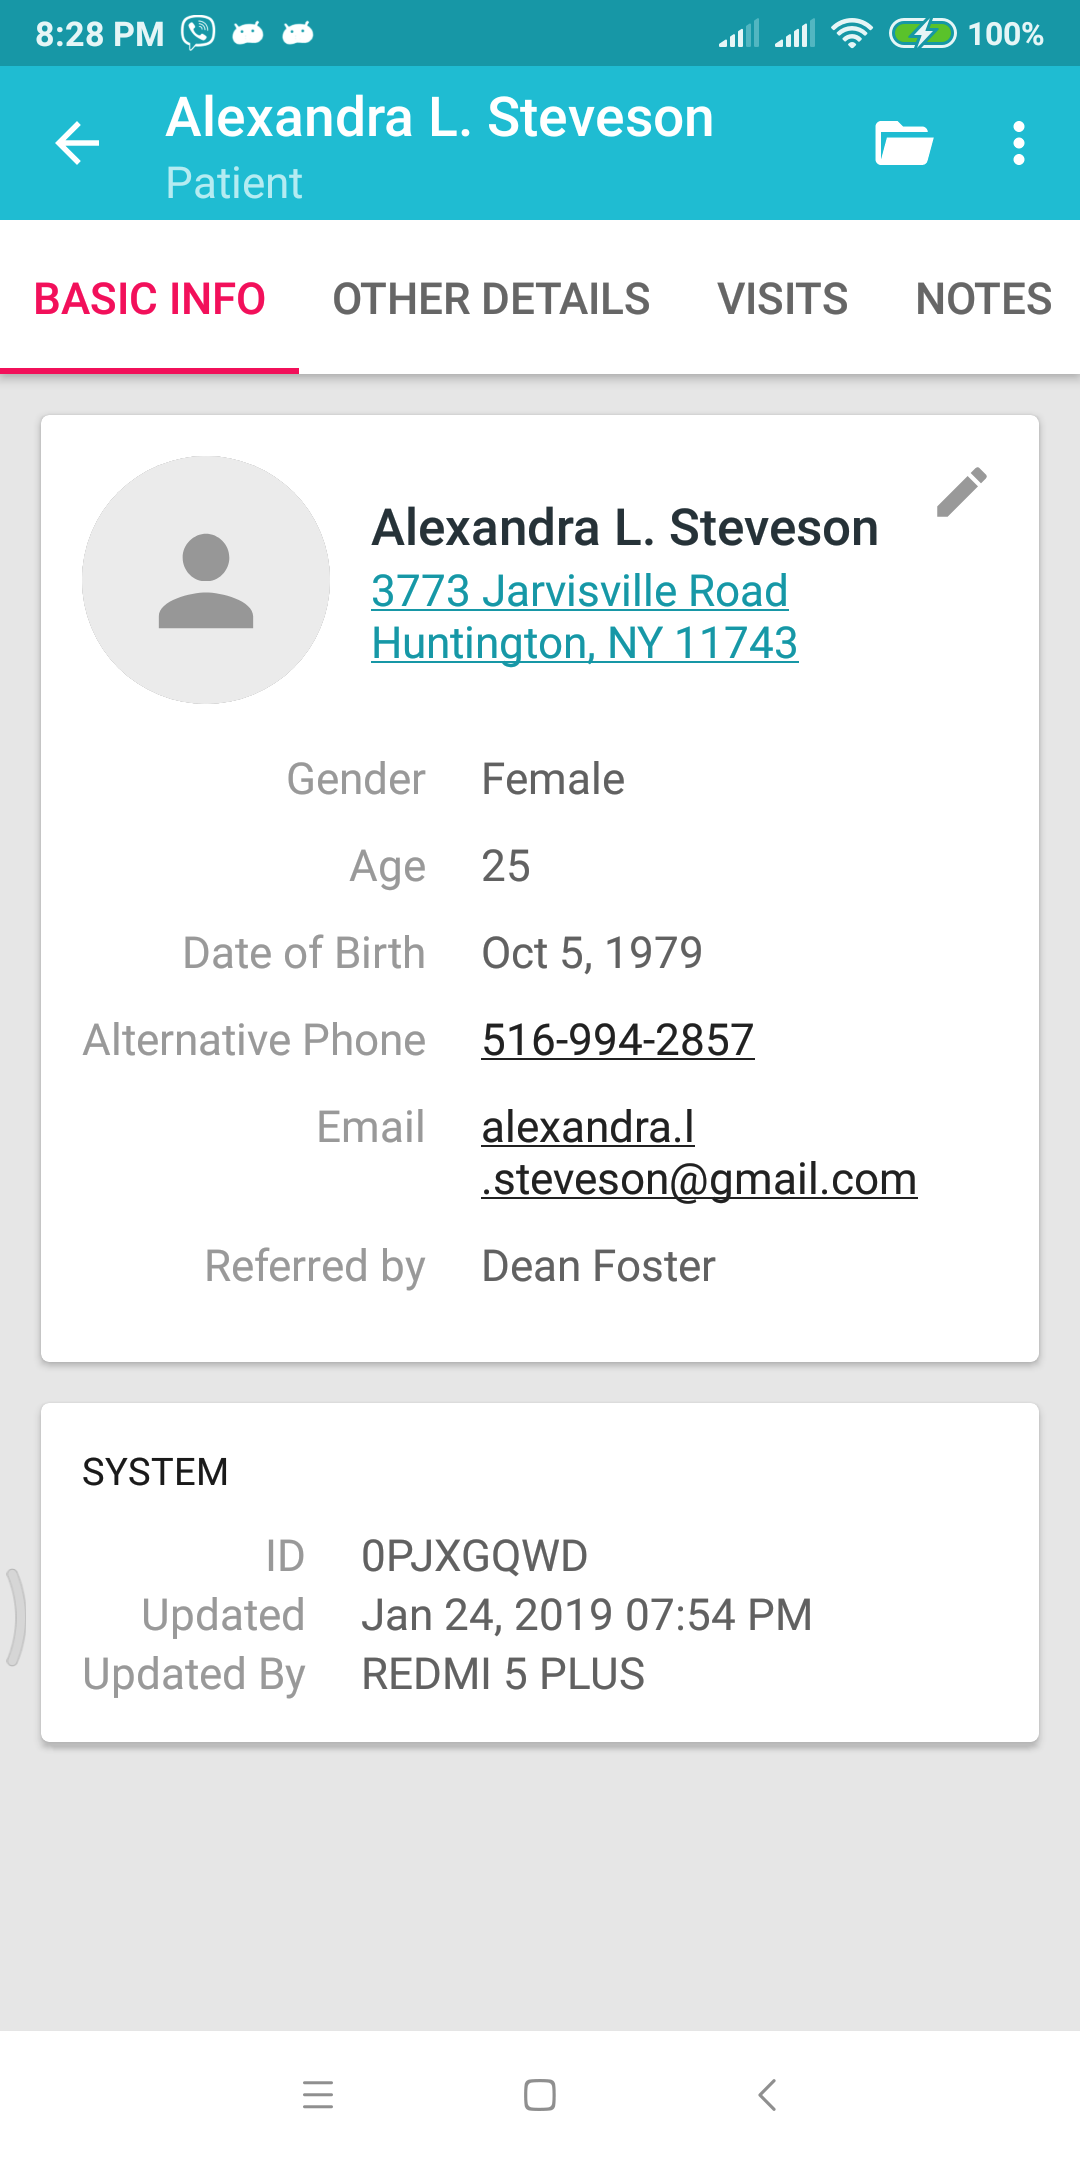
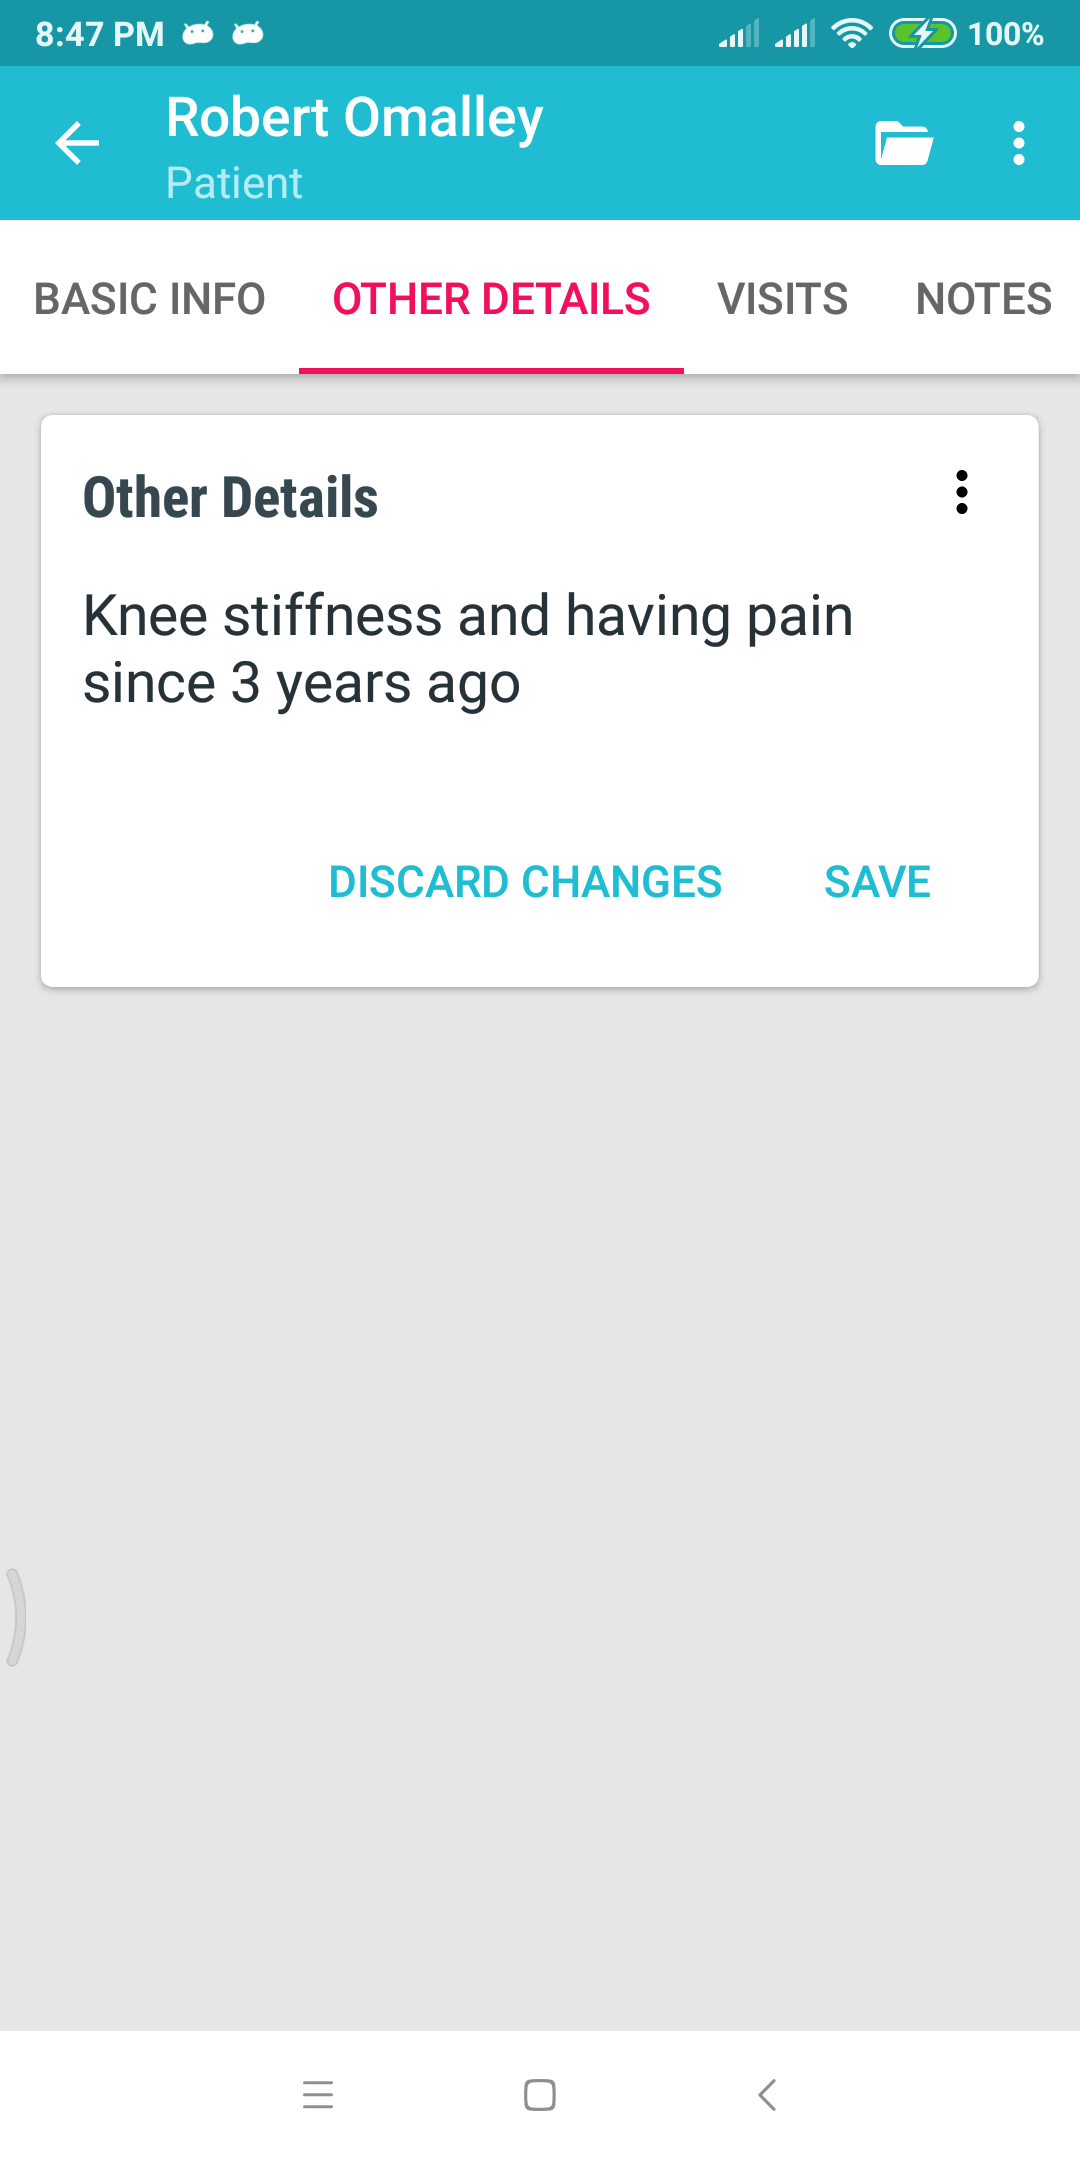
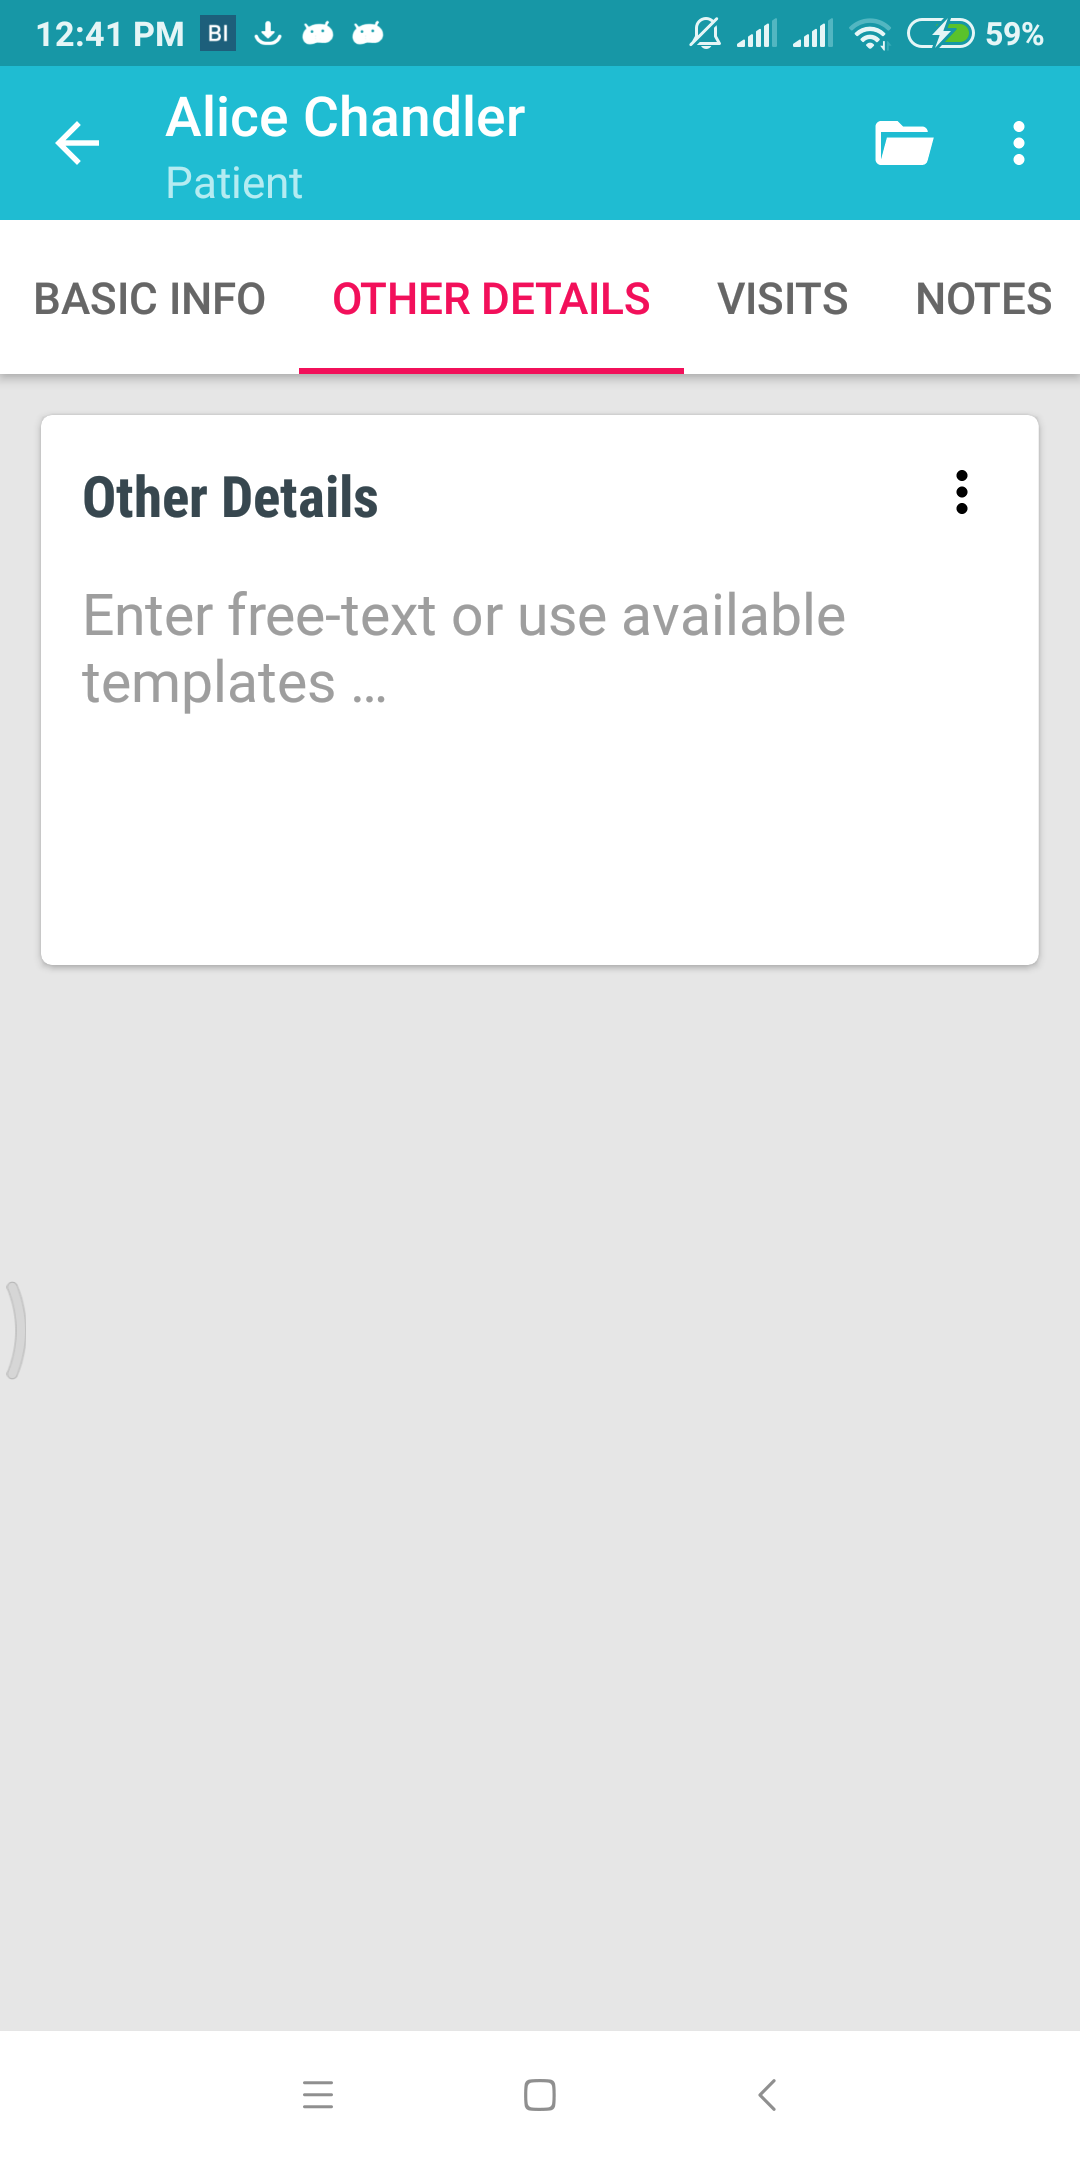
- Other Details – this is the text that appears under the Patient > Other Details tab on the patient record.
- Gender – the patient’s gender. The value should be the same as the text you see when filling up a patient record on the app (either Male or Female).
- Address – the patient’s address. You can enter this as multi-line text in excel if you like.
- Date of Birth – the patient’s birth date. You will need to enter the Age separately from this birth date. Date format either be:
- MM/dd/yyyy (or 01/24/2019 for Jan 24, 2019)
- dd/MM/yyyy (or 24/01/2019 for Jan 24, 2019)
- yyyy/MM/dd (or 2019/24/01 for Jan 24, 2019)
- Since – any date to indicate when this patient first visited your clinic. Date format should follow same rule as date of birth. Keep blank if unsure, it will default to today’s date.
When filled-up, your spreadsheet may end up like this.

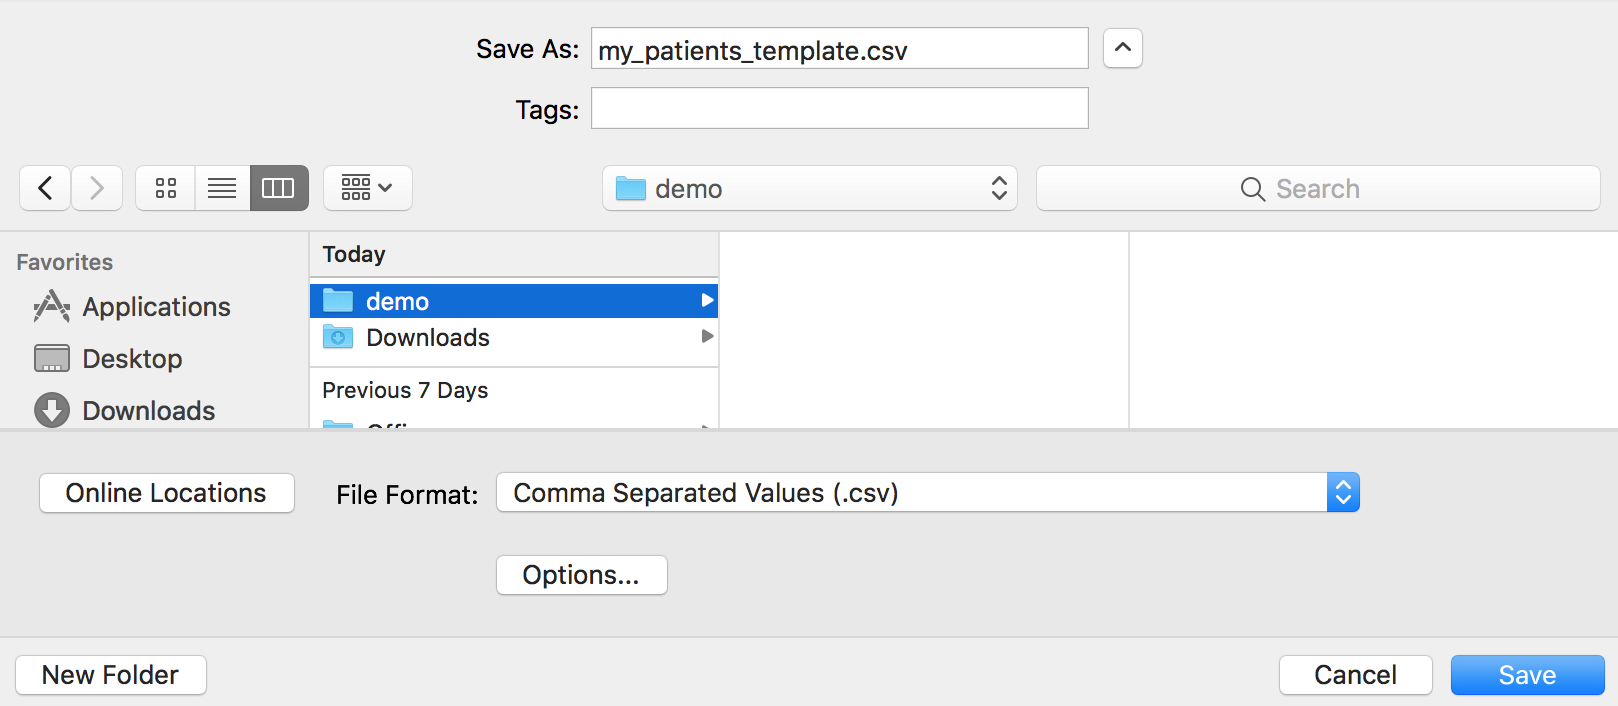
When done inserting your patient details, save the spreadsheet as a CSV file. The file format should be Comma Separated Values (.csv) as shown below.
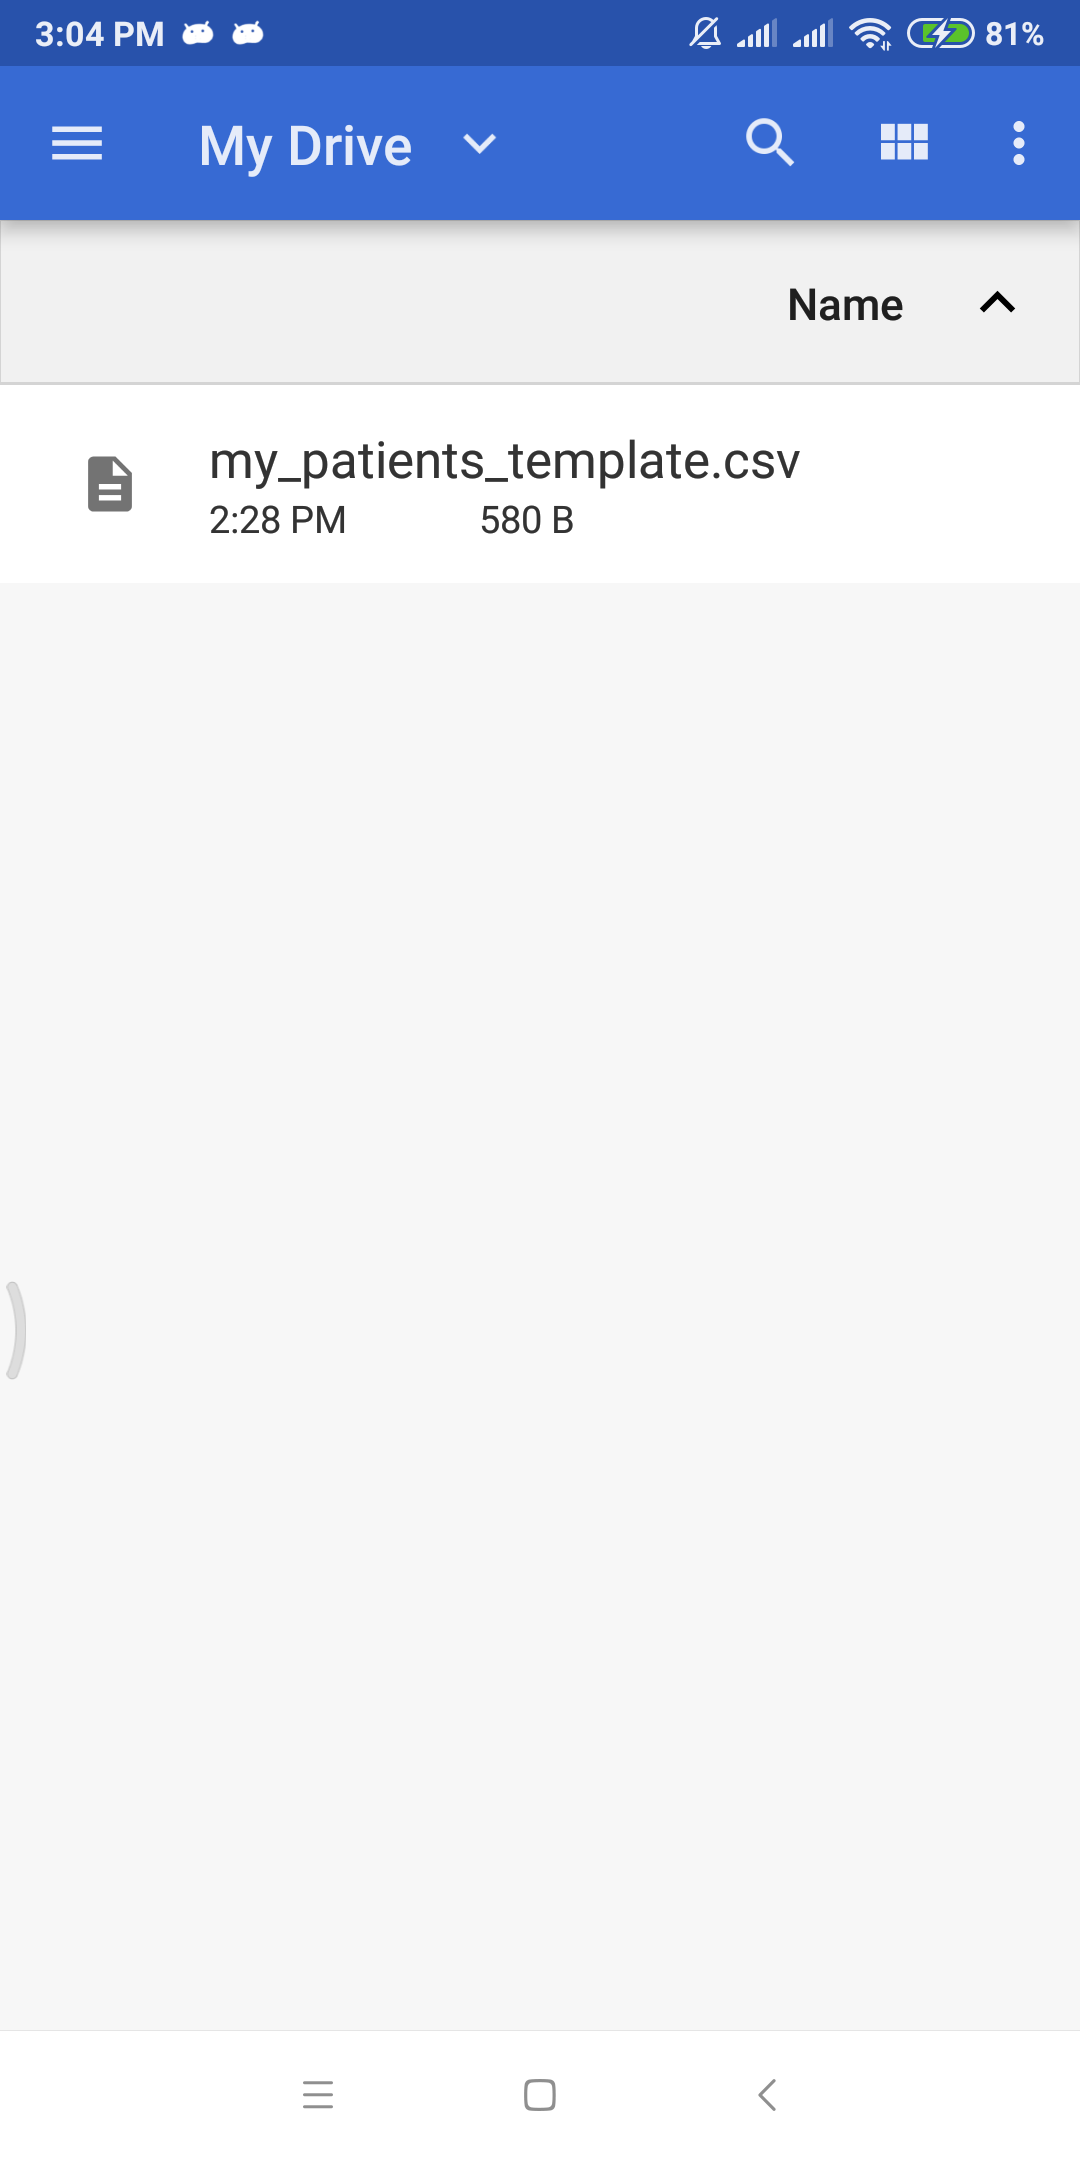
Upload the spreadsheet to Google Drive
At this point, your spreadsheet file is ready to be imported into the app. Let’s make it accessible to your device using Google Drive.
Login to Google Drive from your computer. Navigate to your “My Drive” folder and upload the spreadsheet file here. You can use drag and drop to upload the file to Google Drive.
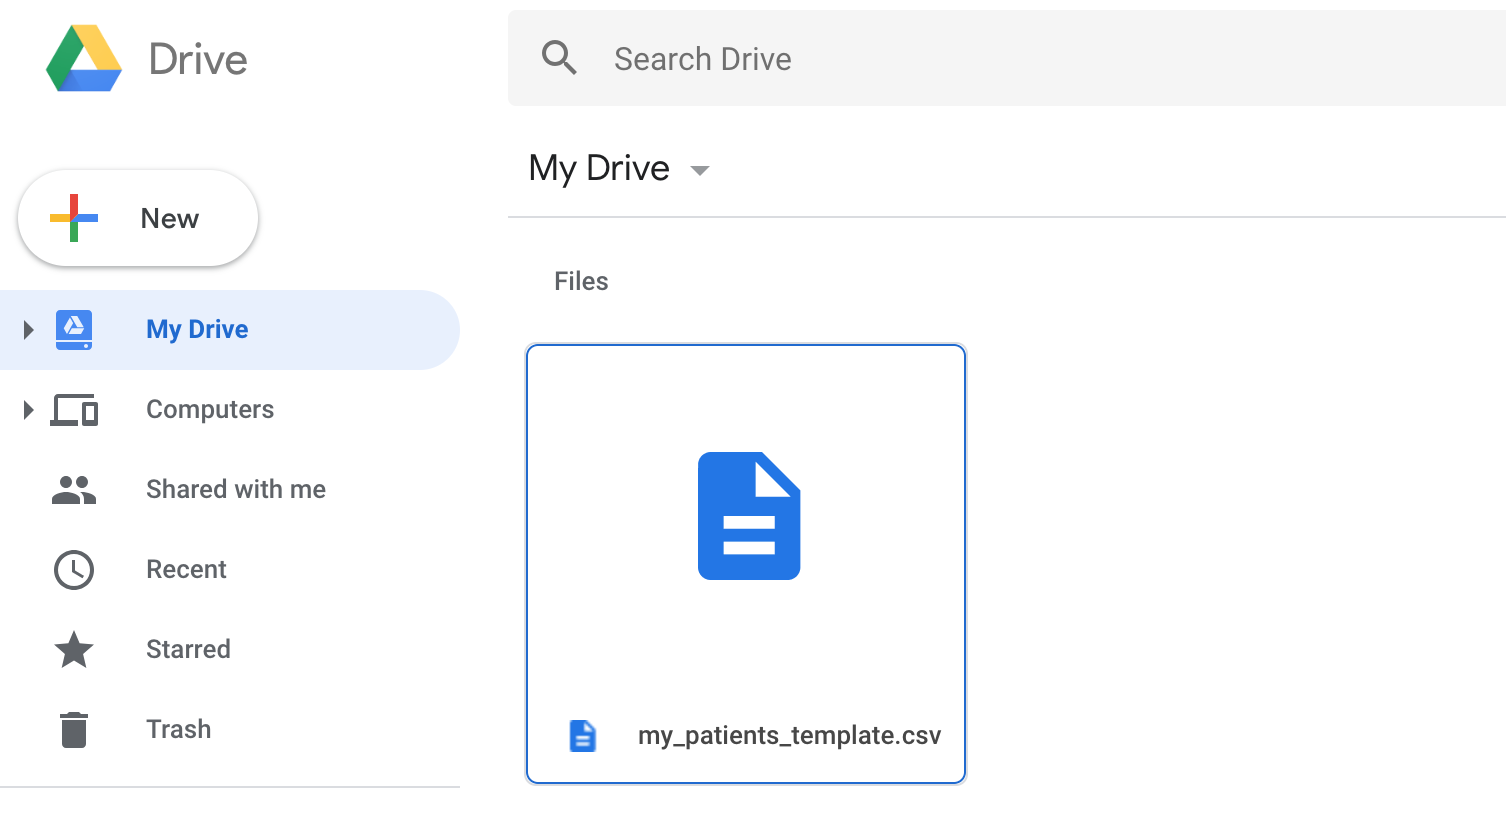
The spreadsheet file is now in your Drive.
Import the patient spreadsheet into Doctor At Work (Plus)
You need to make sure that Google Drive app is also installed on the same device.
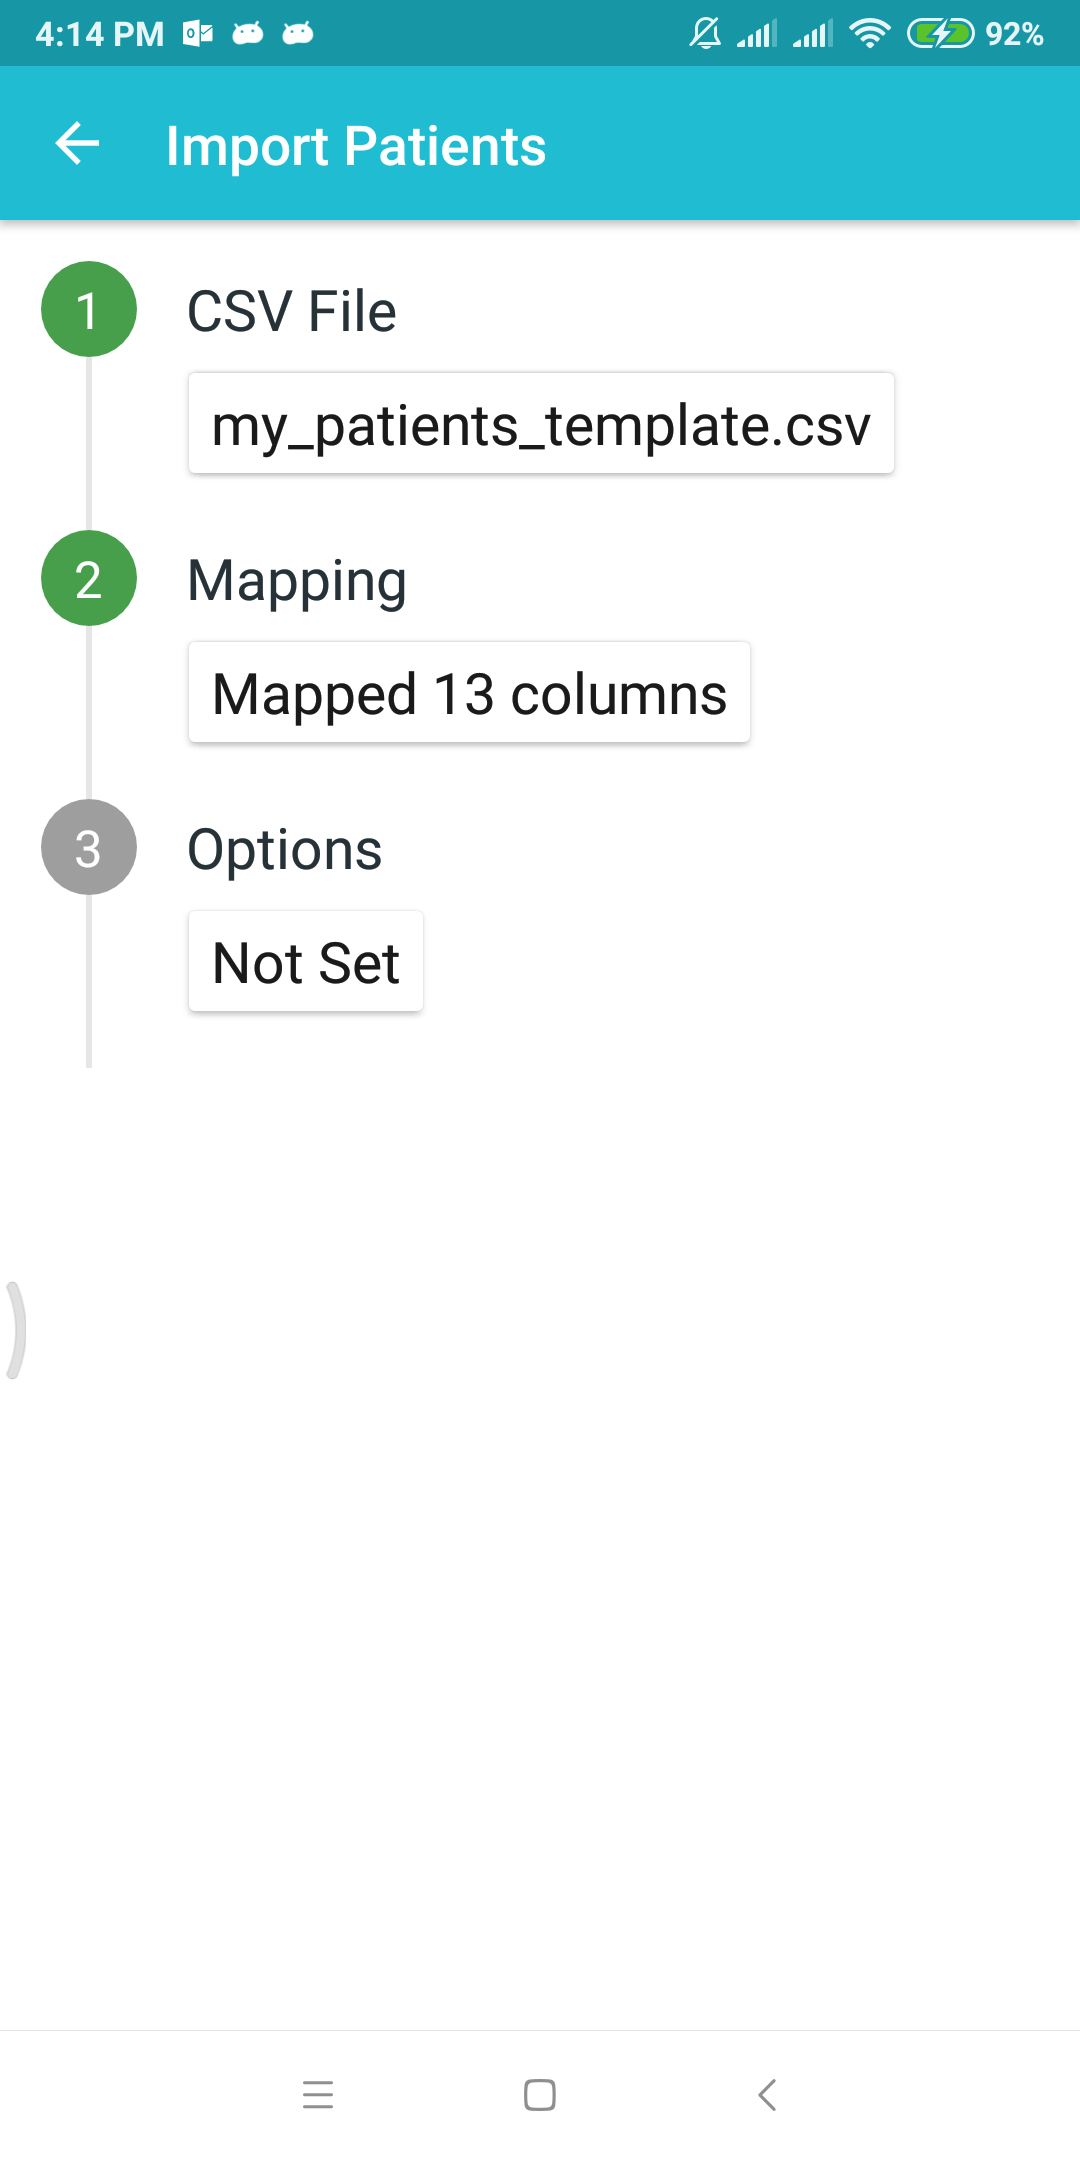
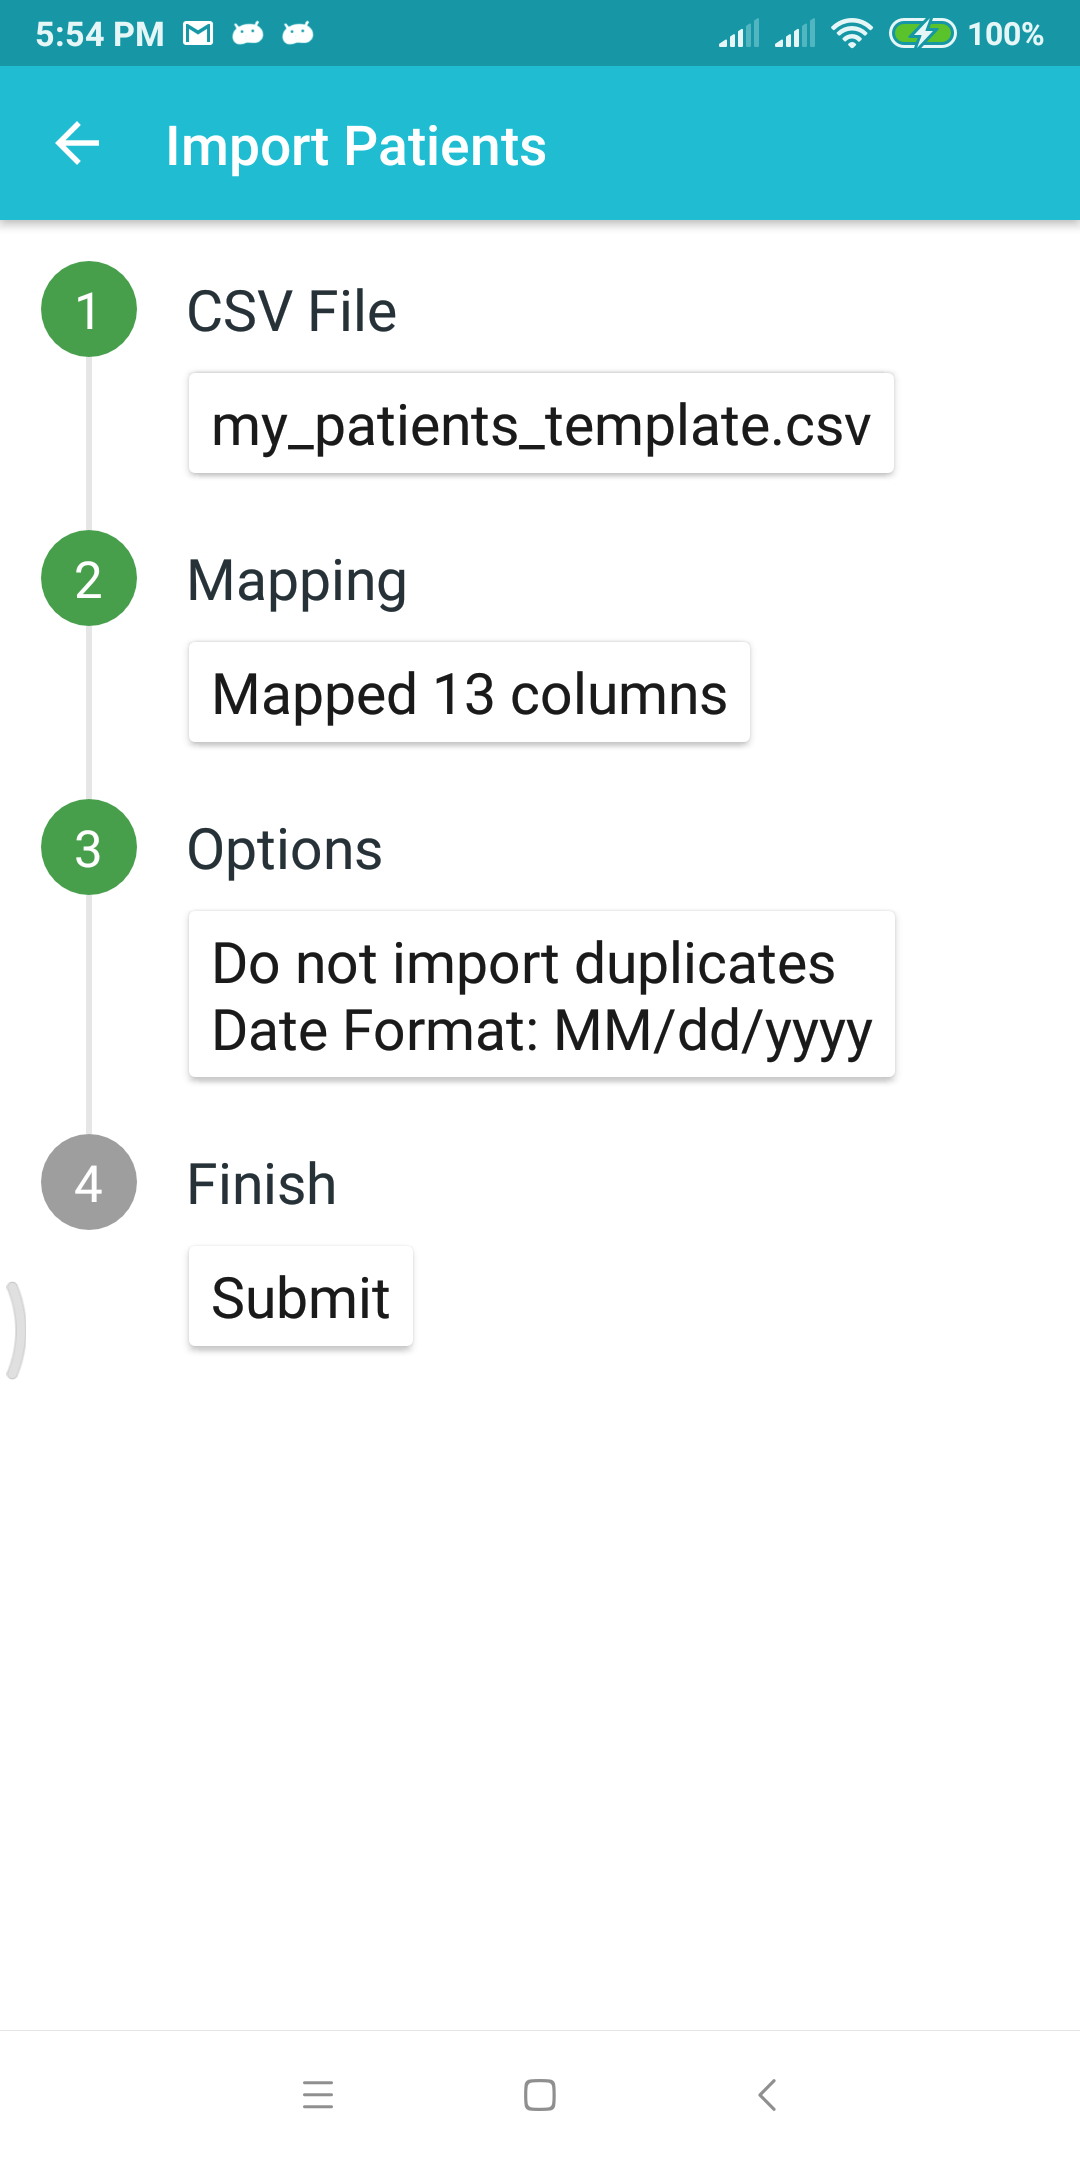
Open Doctor At Work (Plus) app and go to Home > Settings > Import / Export.
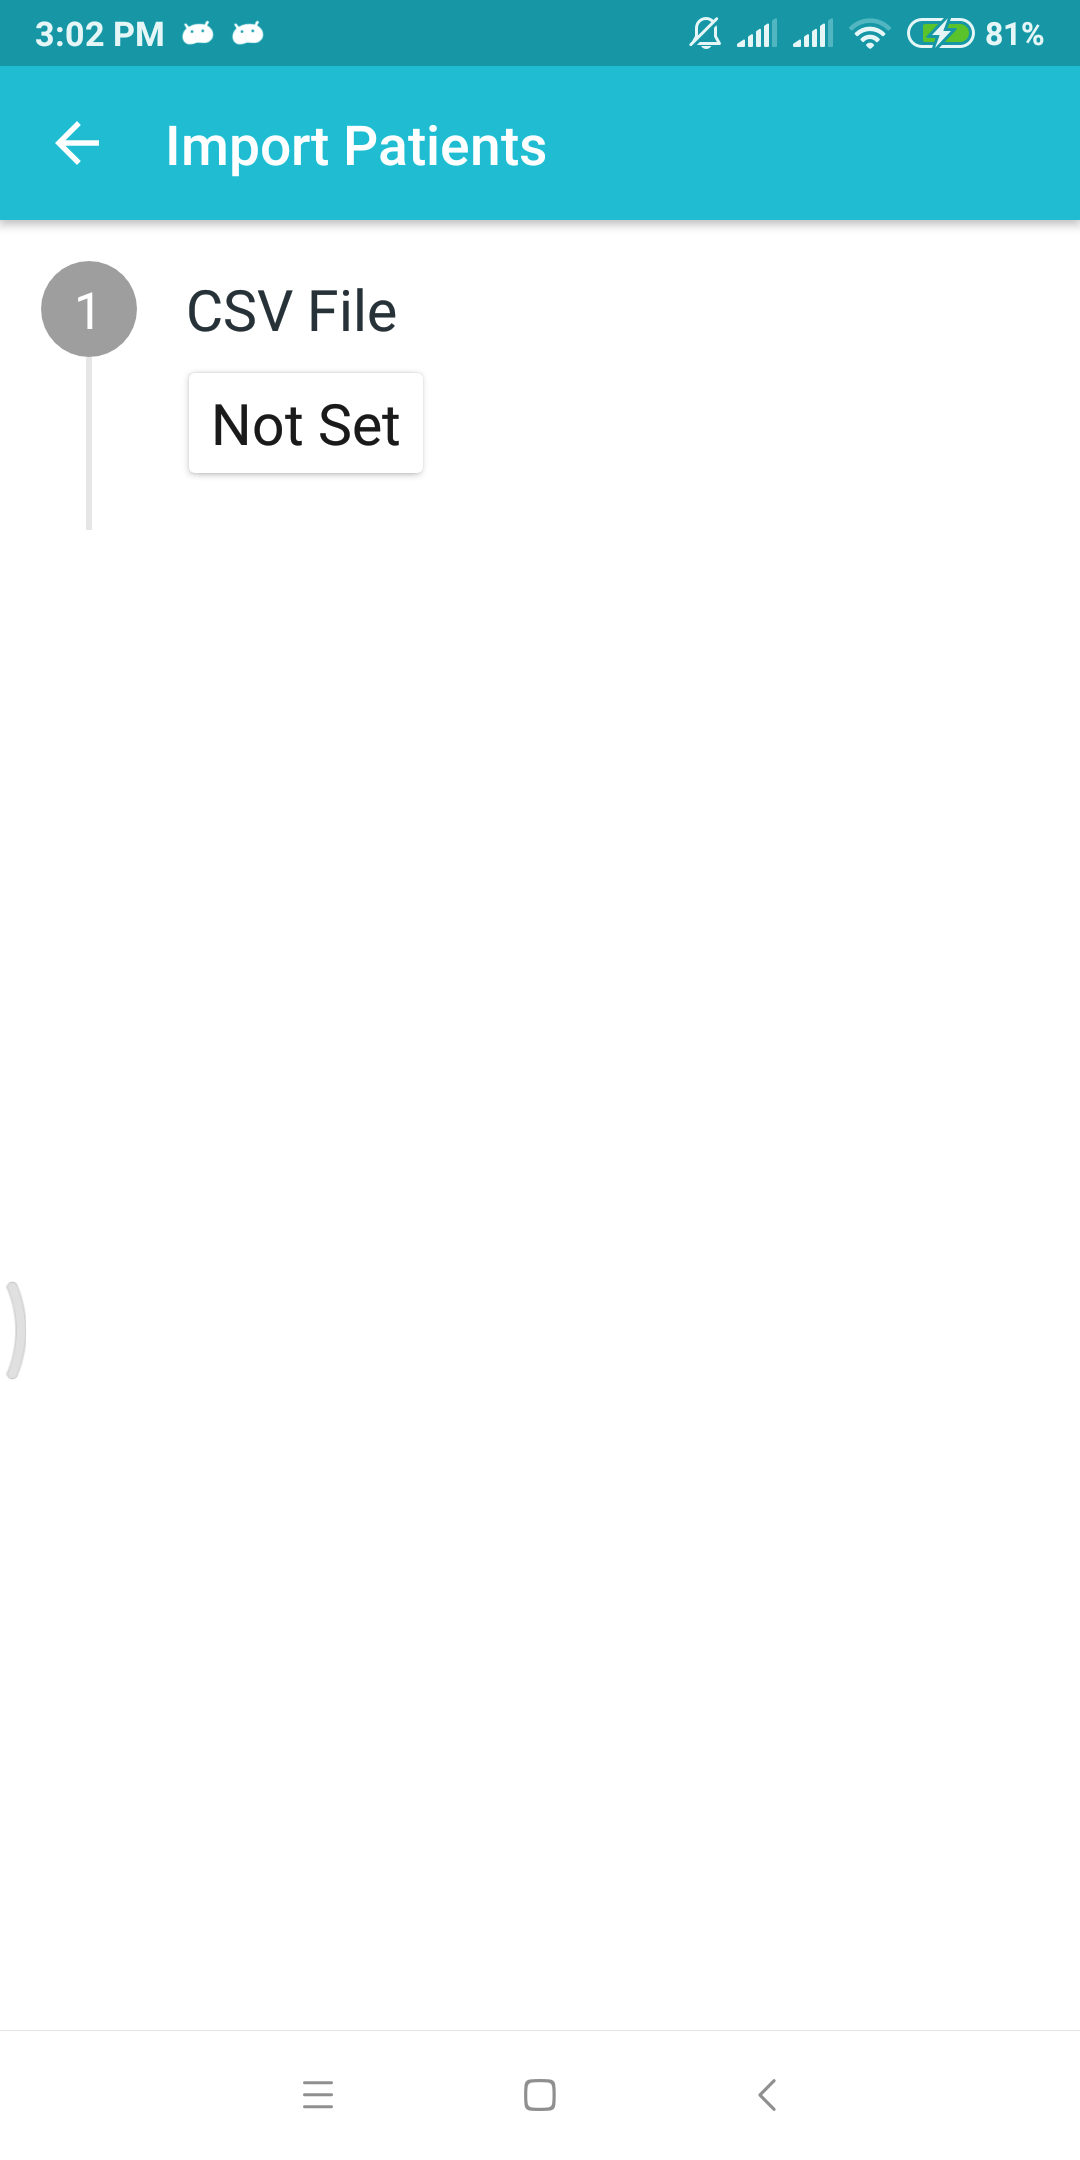
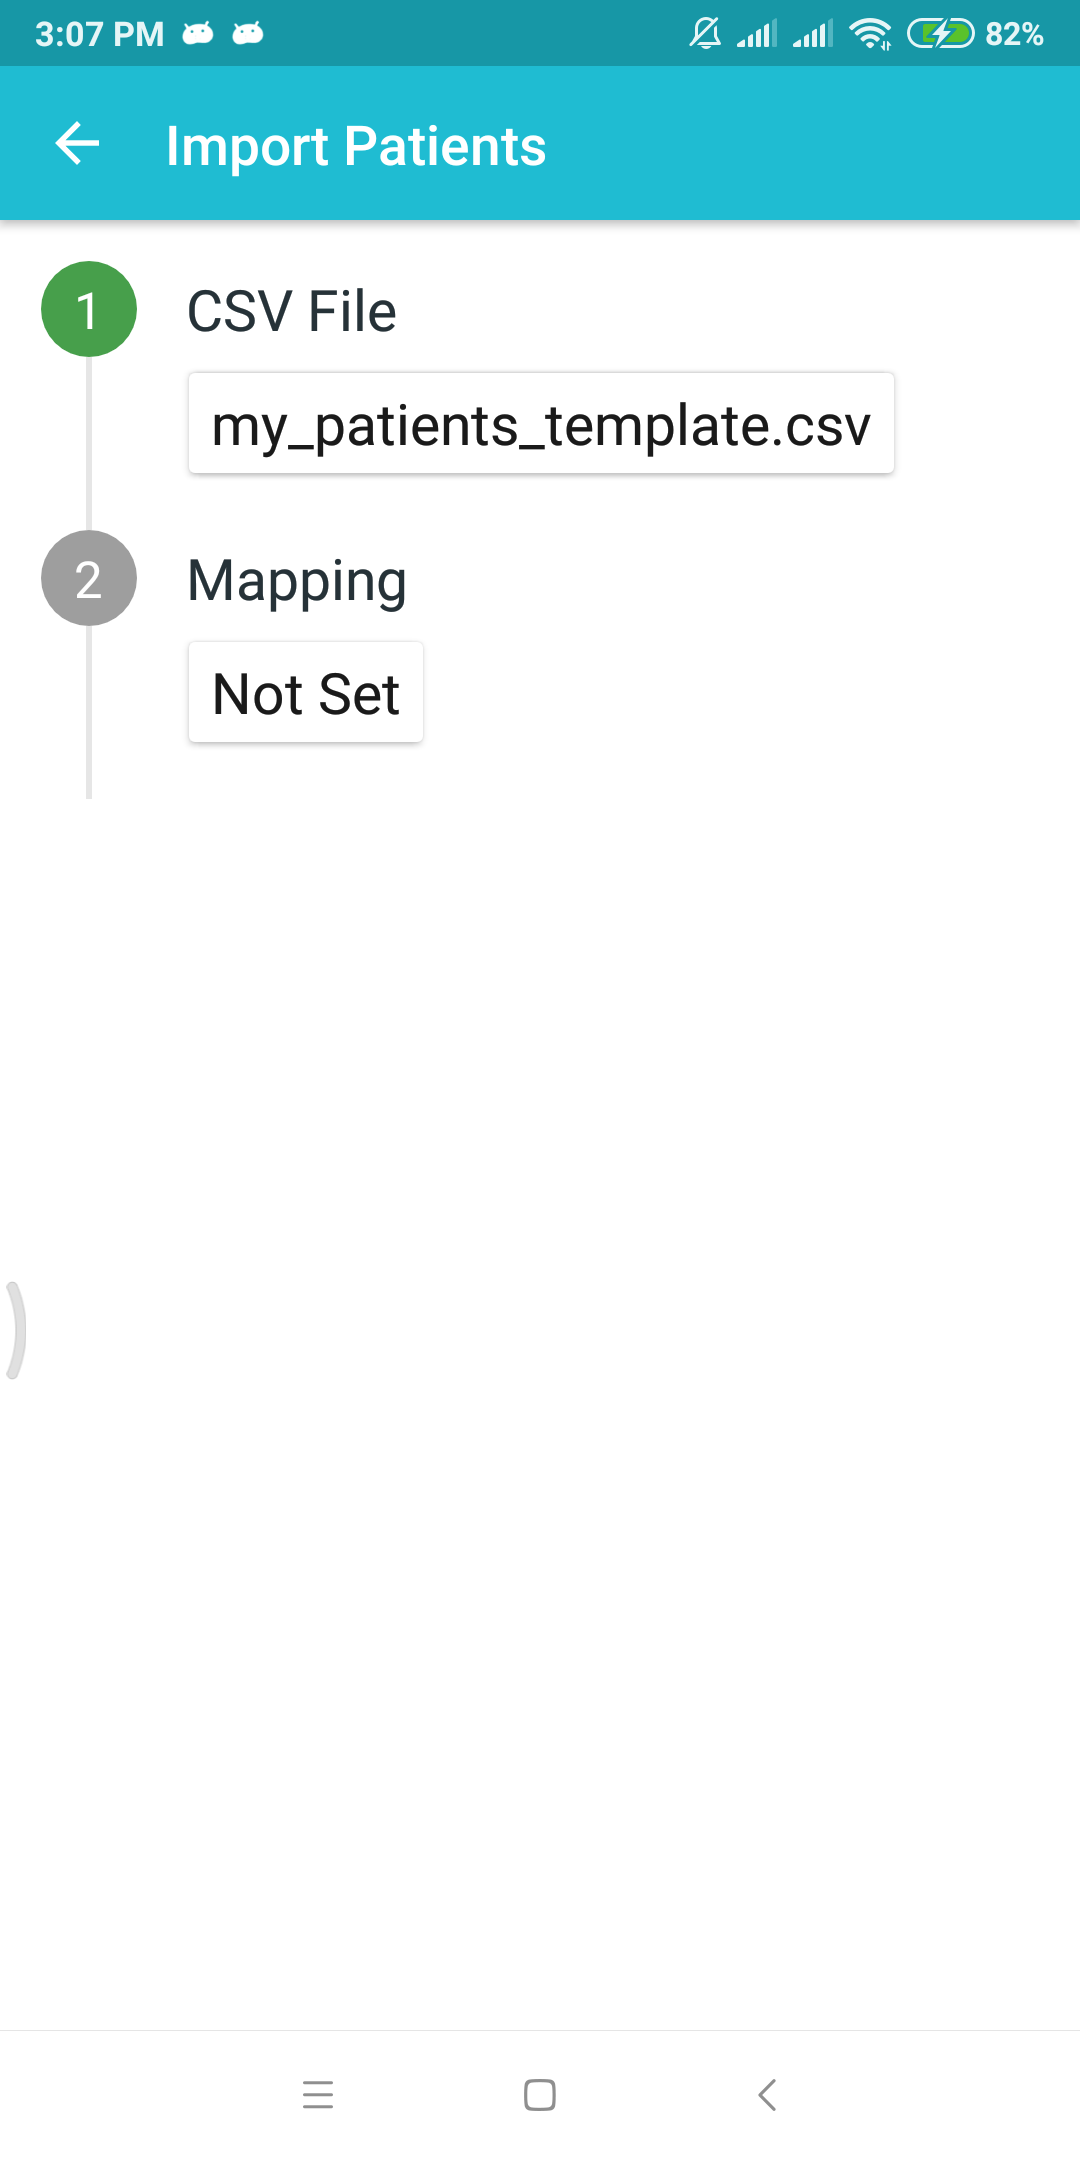
(1) Click on Import > Patients
(2) Click on CSV File > Not Set button to find the spreadsheet template.
(3) This will open the device’s file navigator. Open from Drive and navigate until you see the edited spreadsheet file. When you see it, click on it to select.
(4) Next we need to map the column headers on the spreadsheet against the actual patient record fields on the app. Click on the Mapping > Not Set button to begin.
(5) The spreadsheet headers are shown on the left and the actual patient fields are on the right. Click the magic wand icon (at the top) to auto map some of the fields.
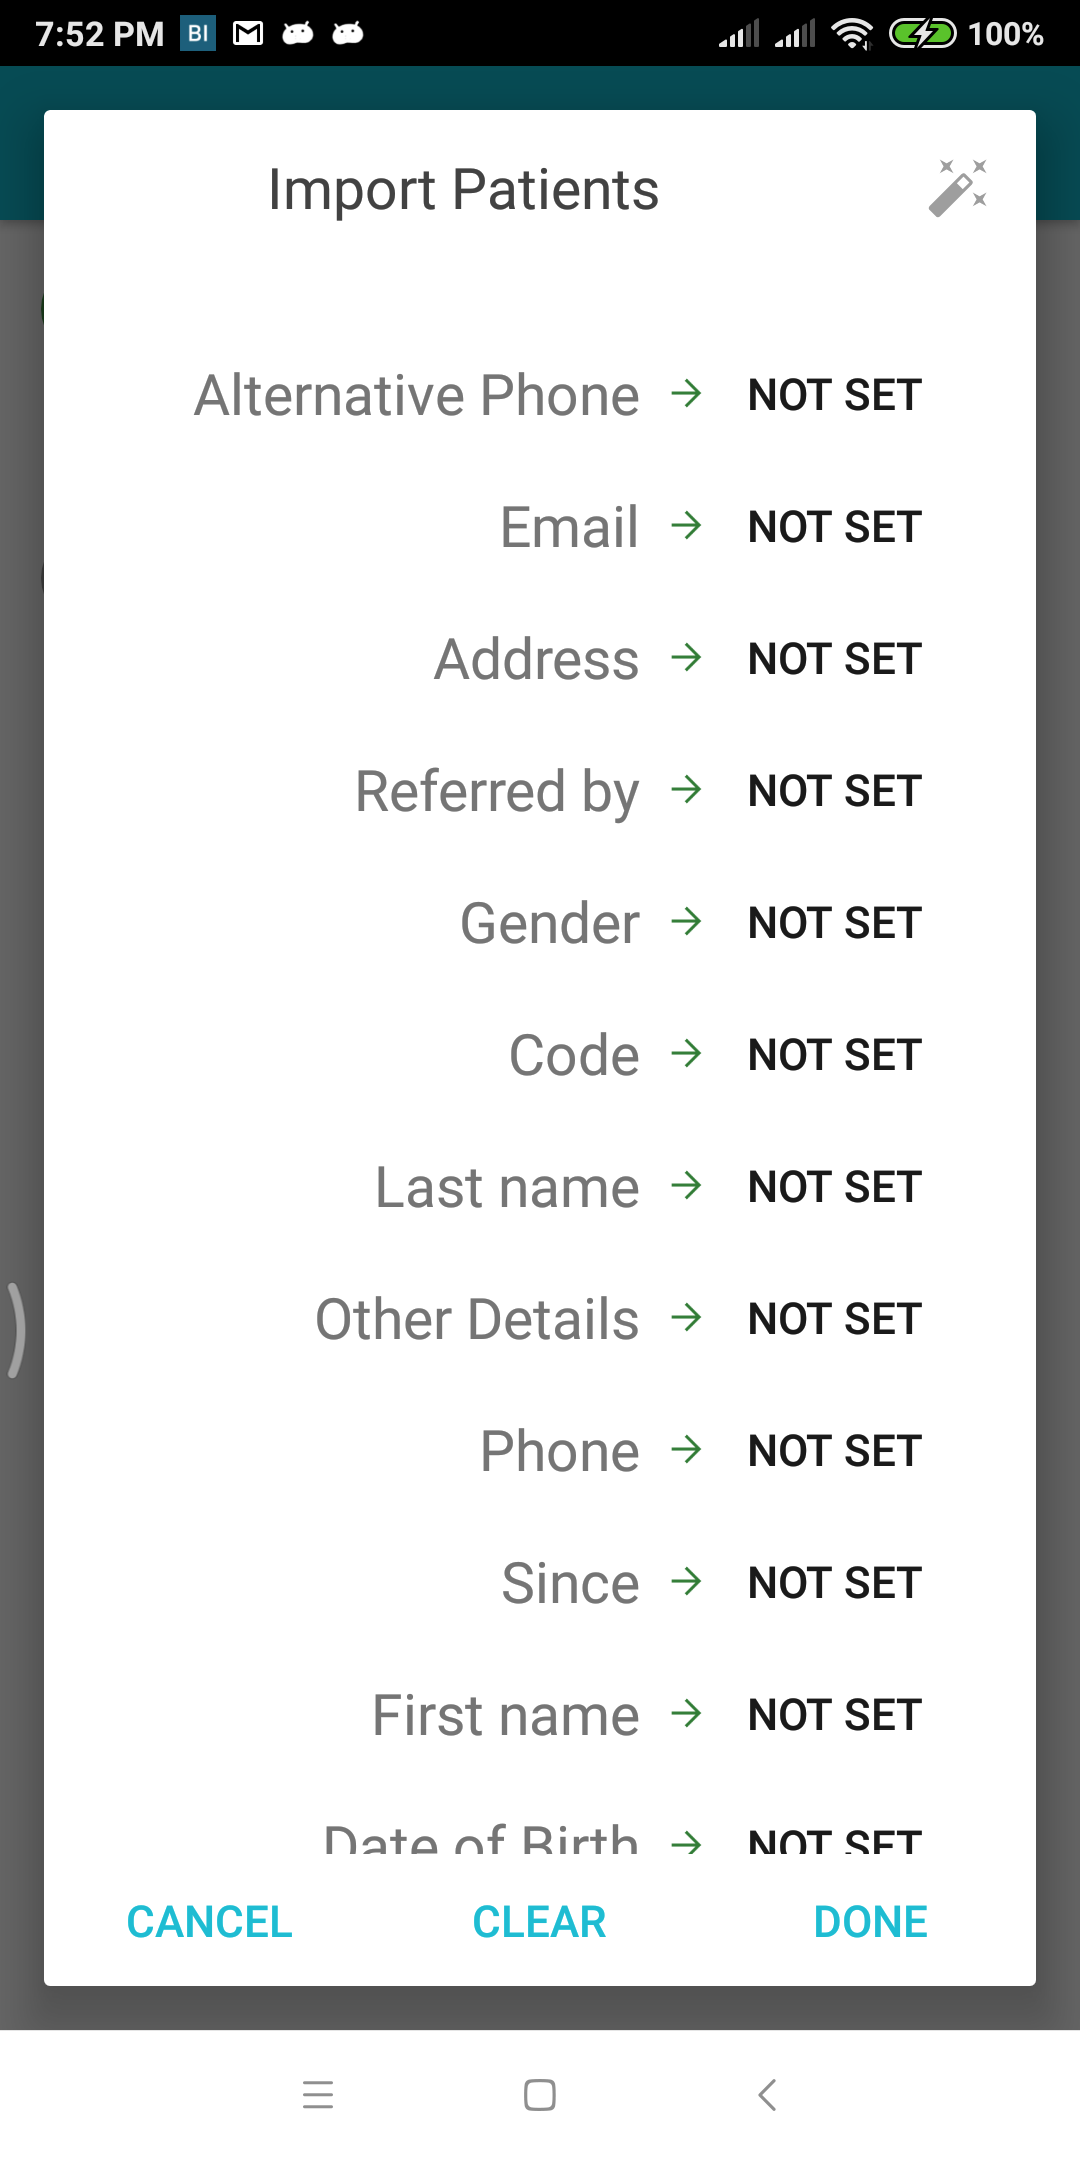
(6) Notice that some headers are not auto mapped. You can fix this by setting the mapping manually. Let’s map the Other Details column.
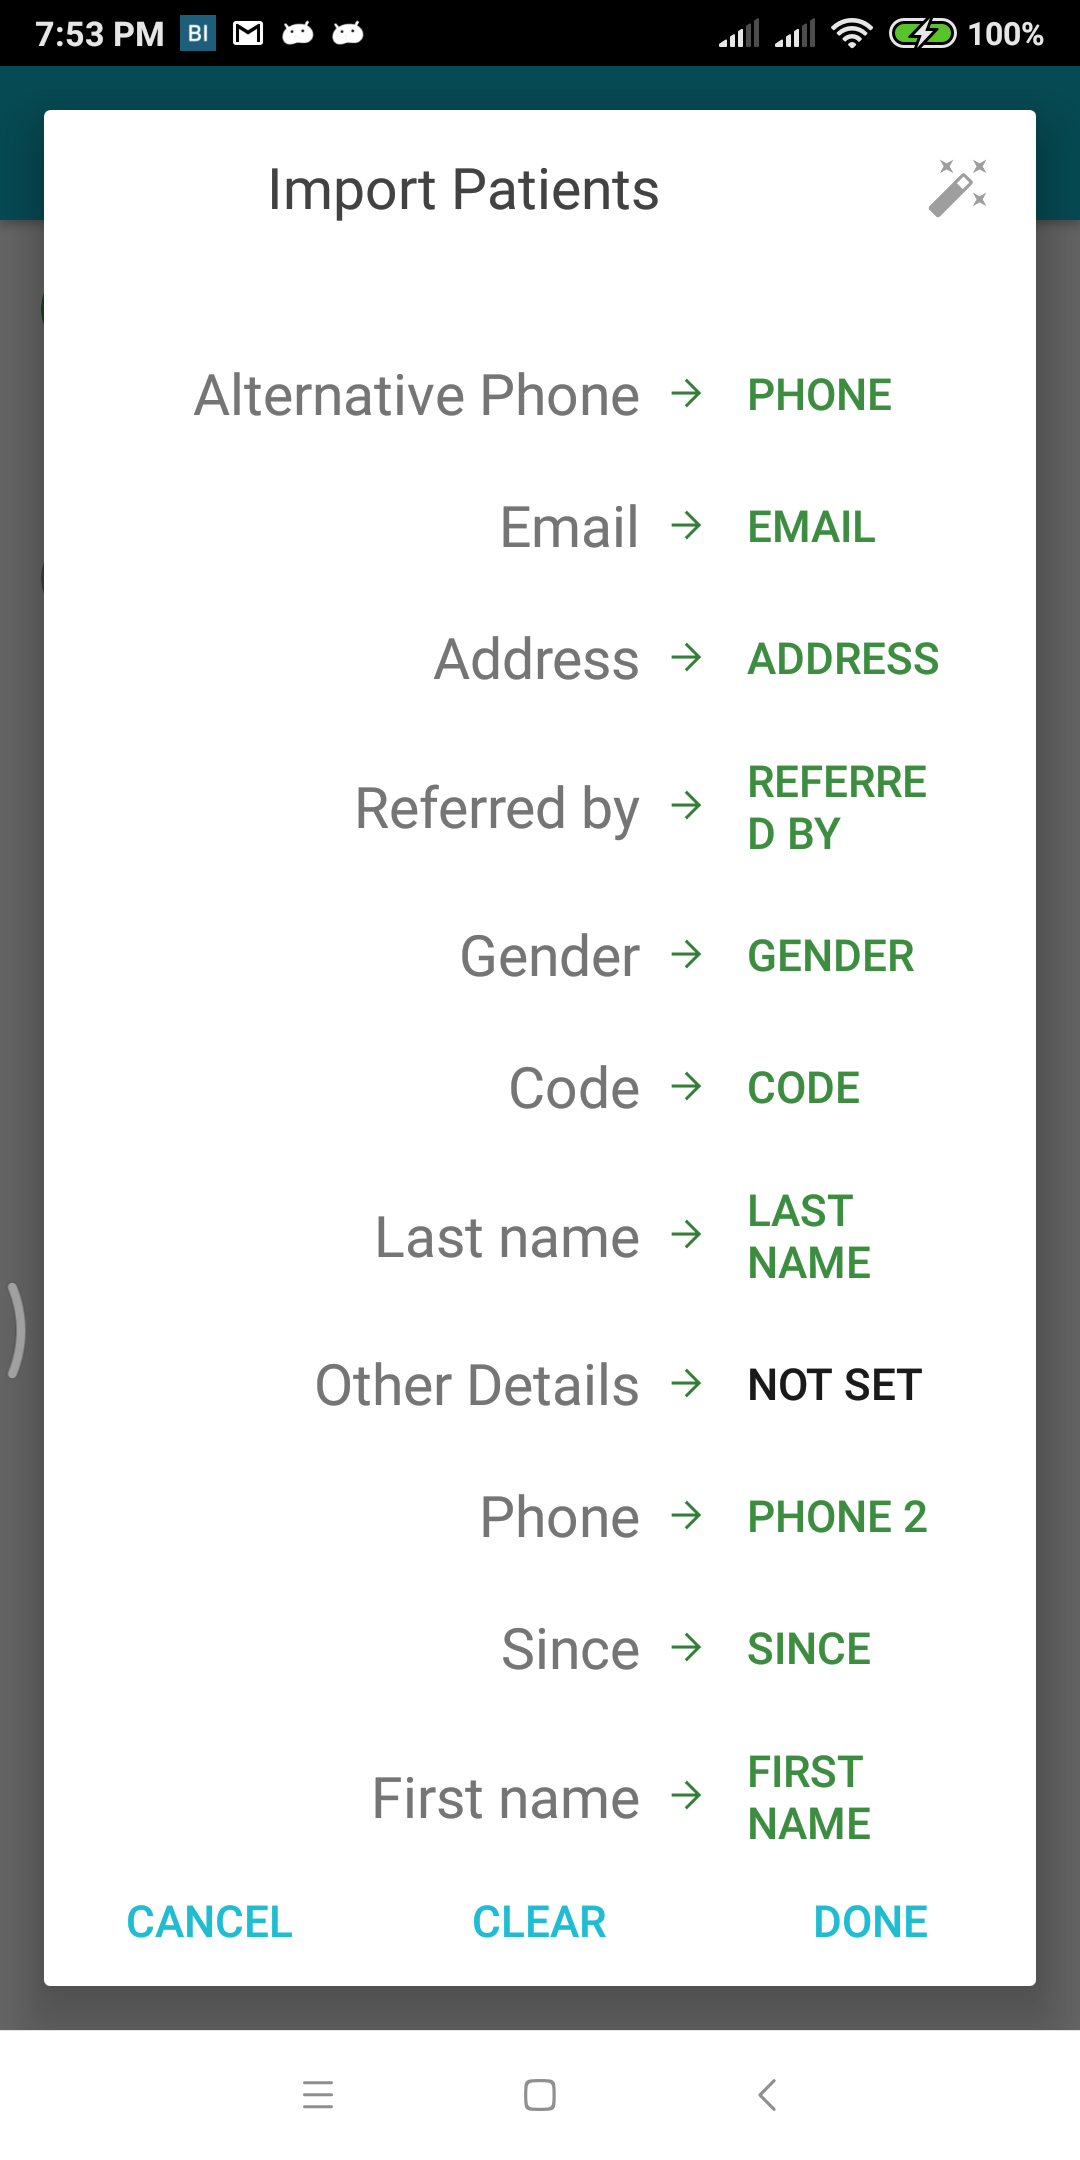
(7) We will use the Patient > Other Details as the target field for the Text column on the spreadsheet.
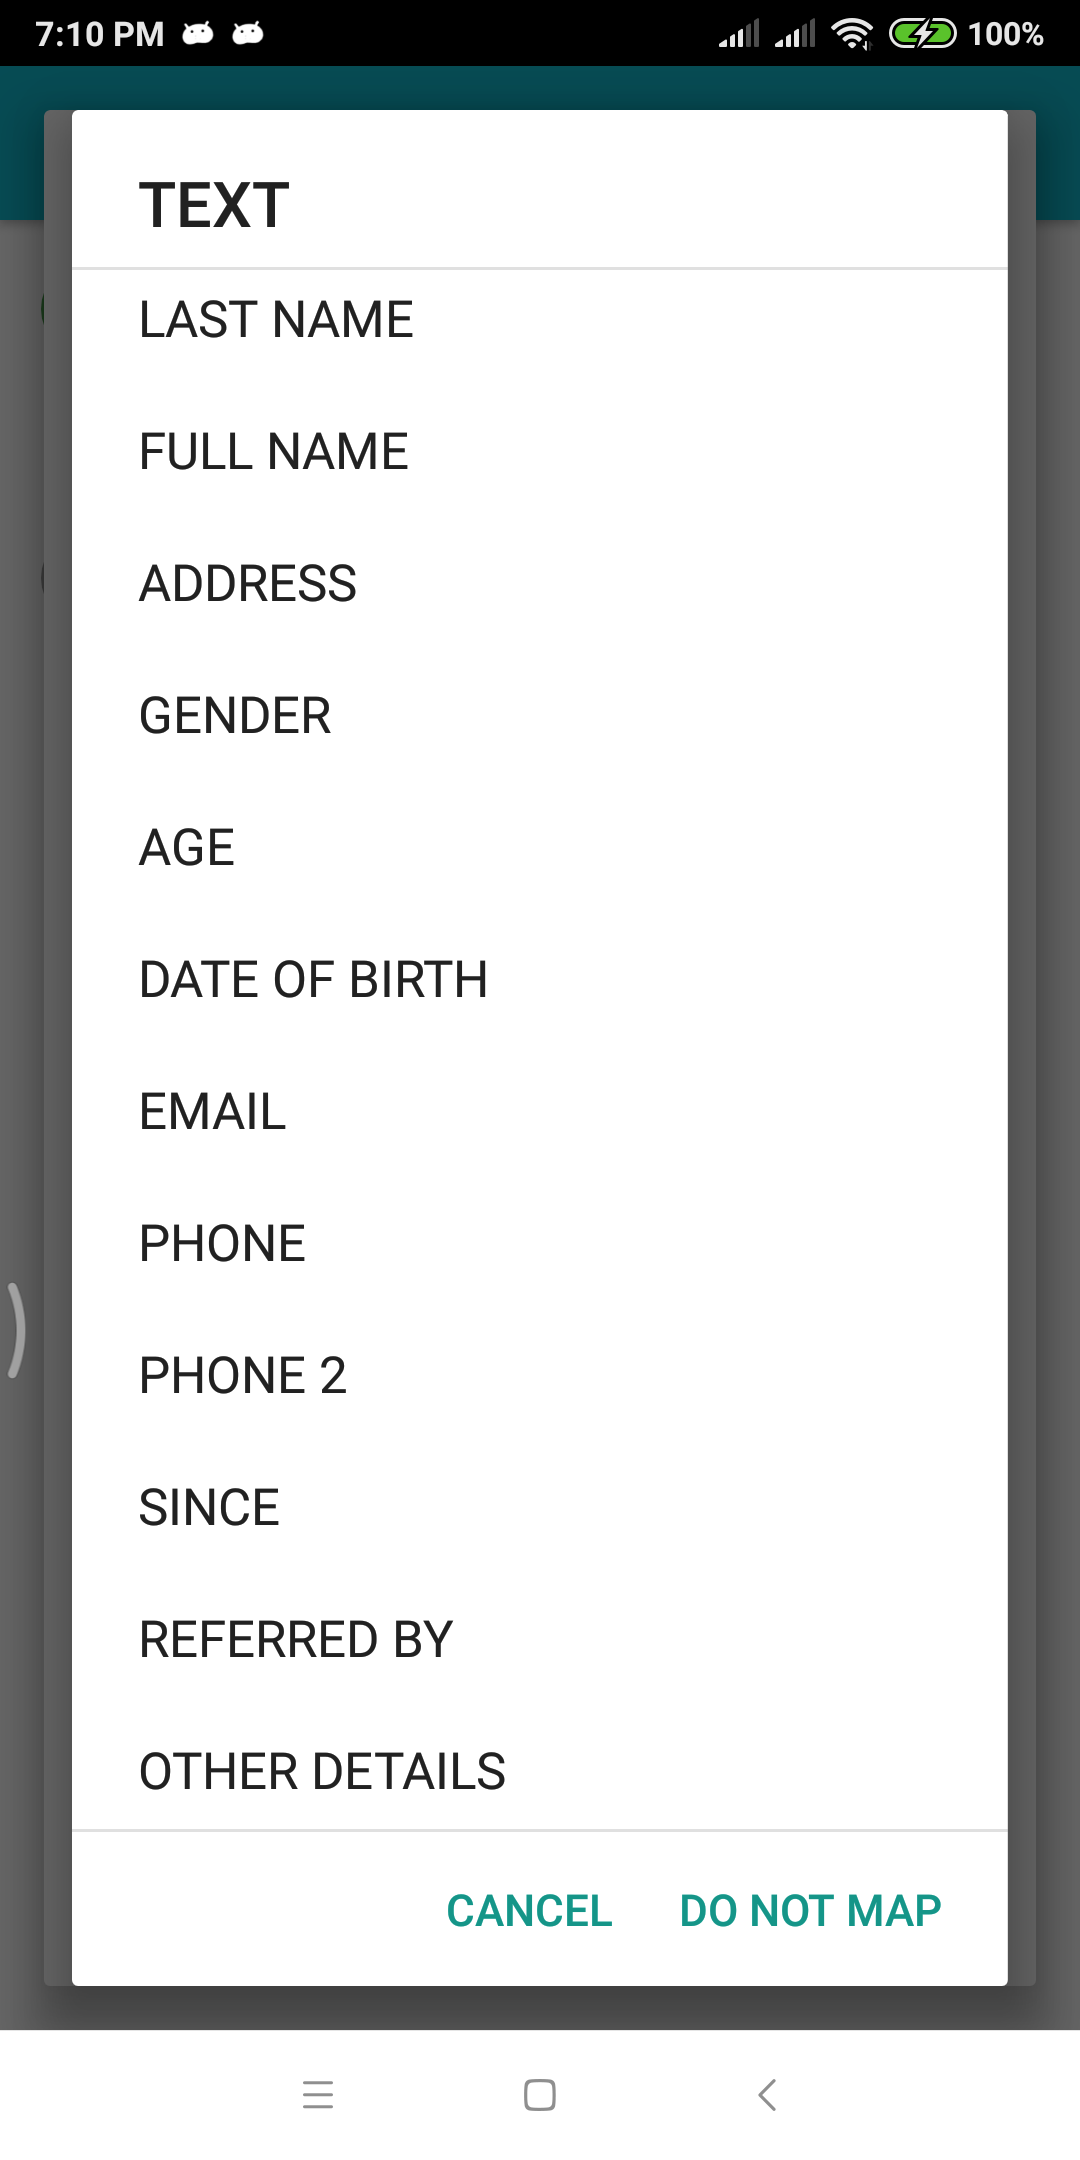
(8) Text is now mapped to Notes.
Continue to review the mapping to see if everything would go to the proper fields. This mapping would be applied to all patient details on the spreadsheet so best to make sure they are mapped correctly.
If you want to ignore some columns, do not map them. Keep them to Not Set.
Click Done to continue.
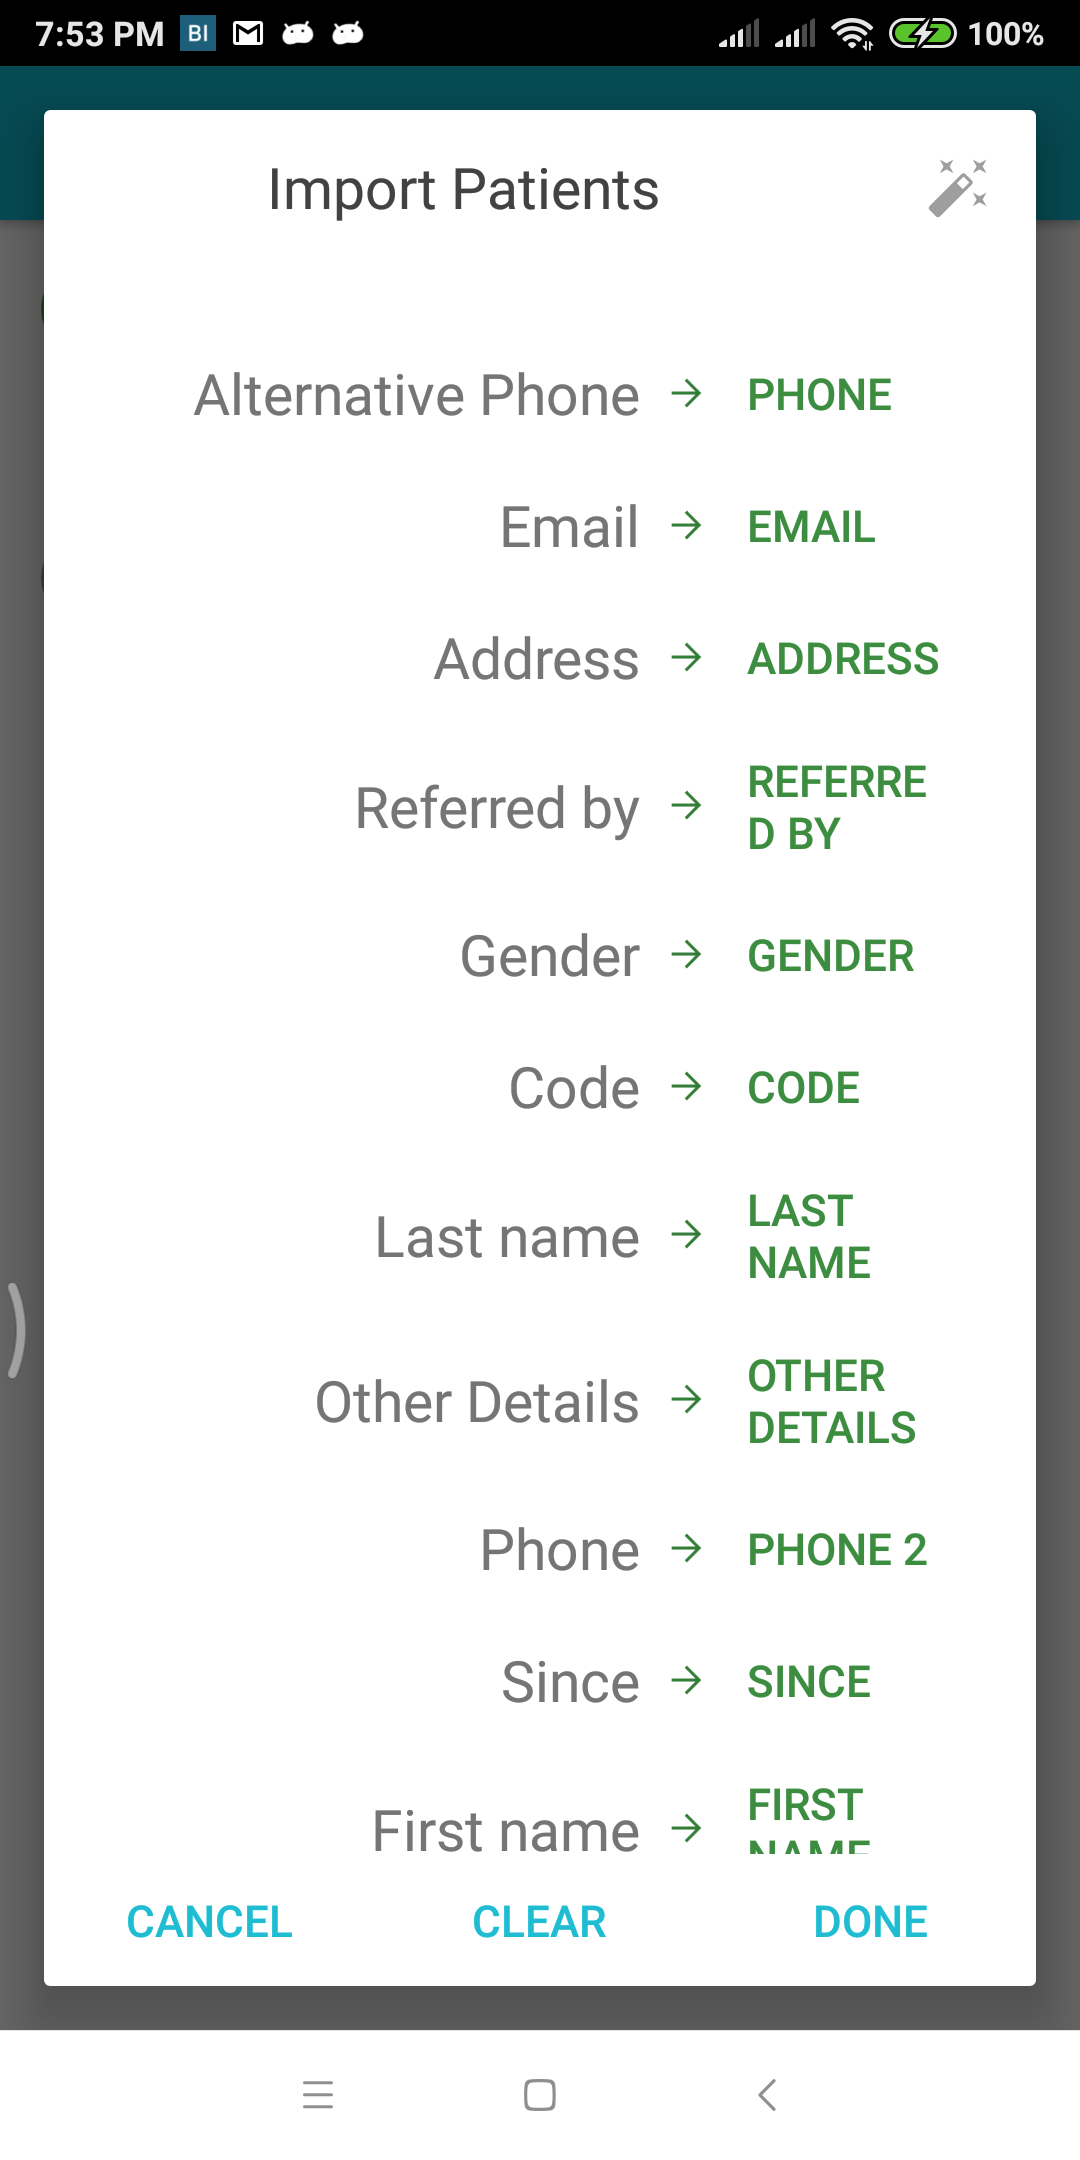
(9) The columns that we want are now mapped. It is time to set the import options next.
Click Options > Not Set button.
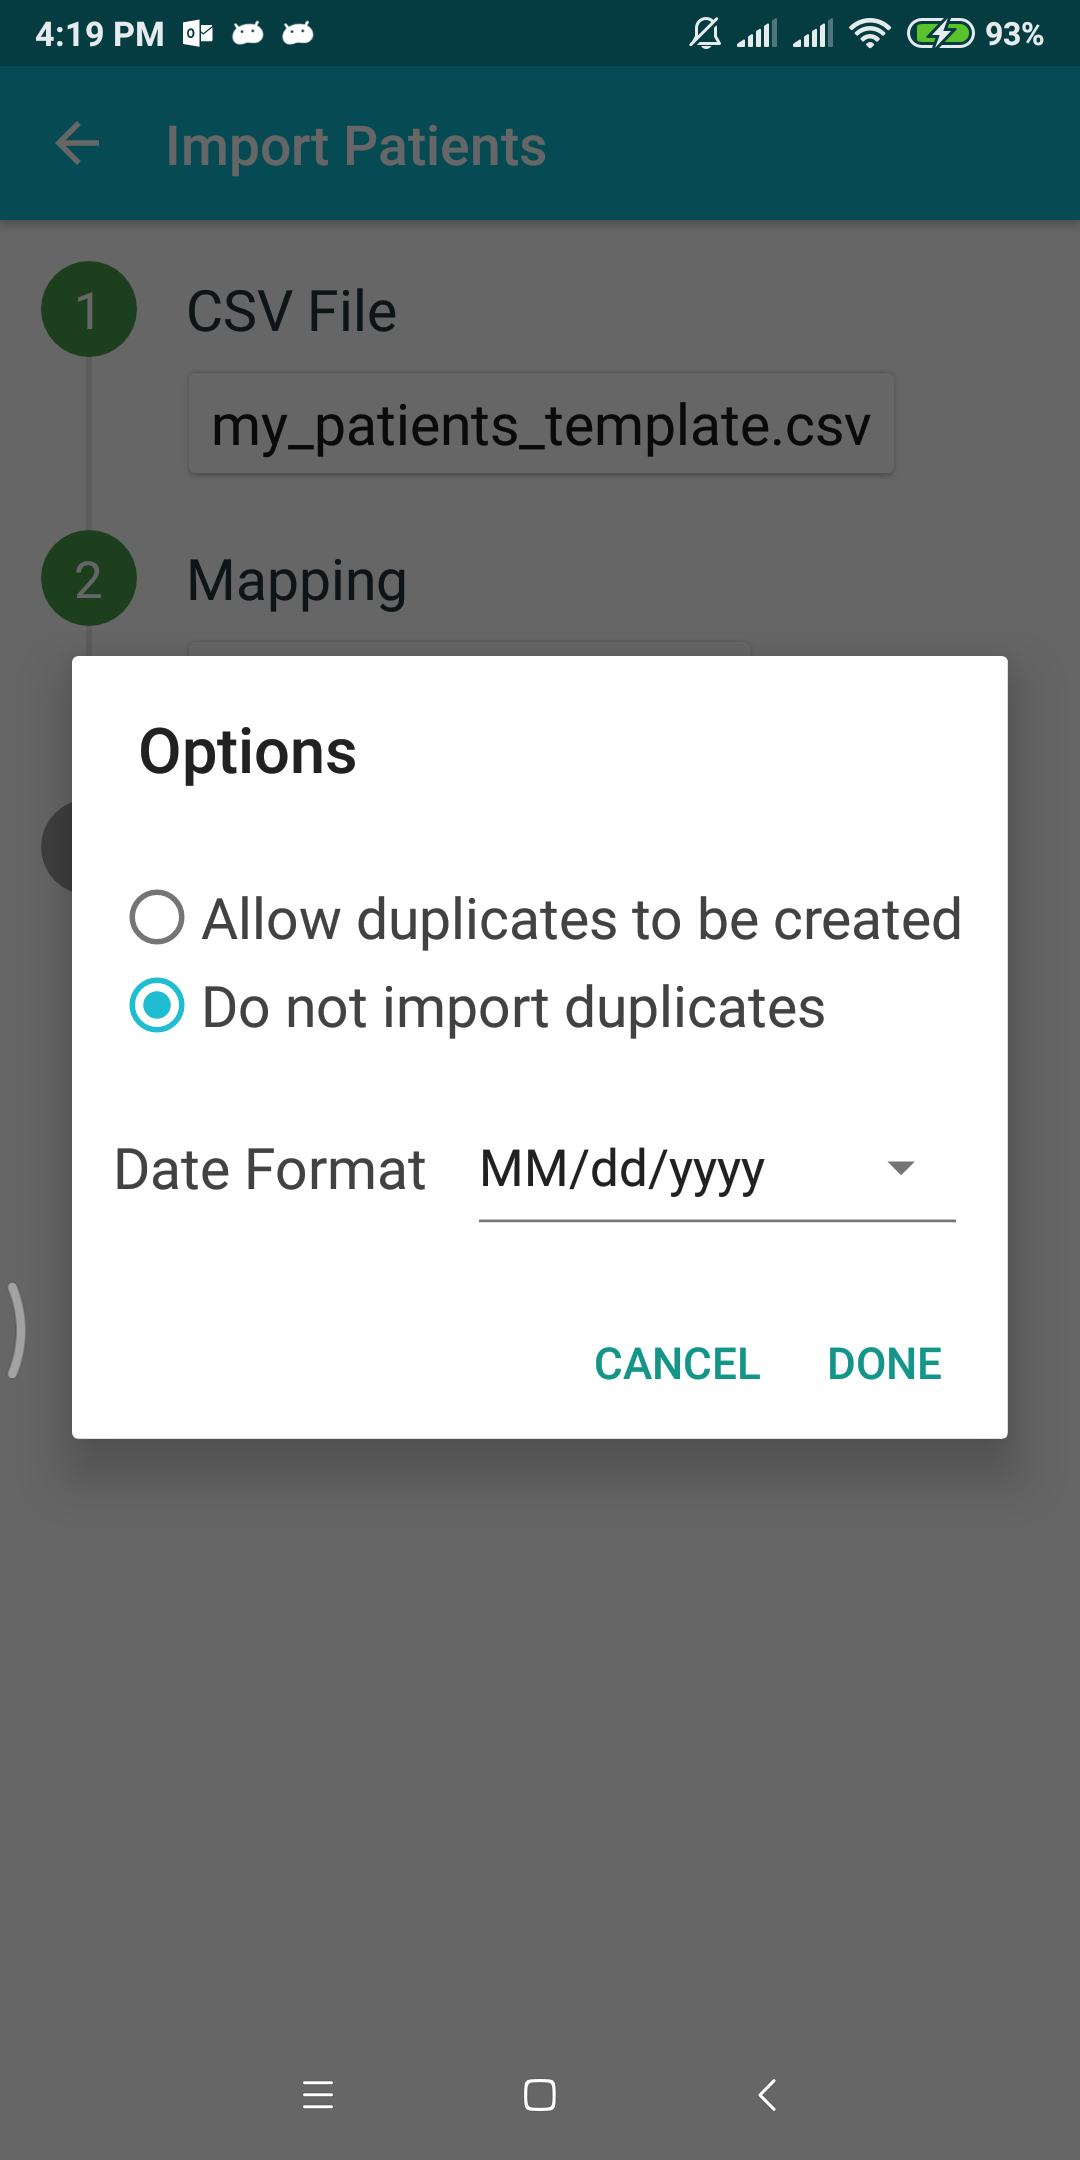
(10) These are the options you can set.
Date Format – select the date format used on the spreadsheet template. It should match otherwise the date won’t be read correctly.
Duplicate detection – if two patients share the same name, they are considered duplicate. By default, the app will not import duplicate patients.
(11) Click Submit to begin importing your patient list.
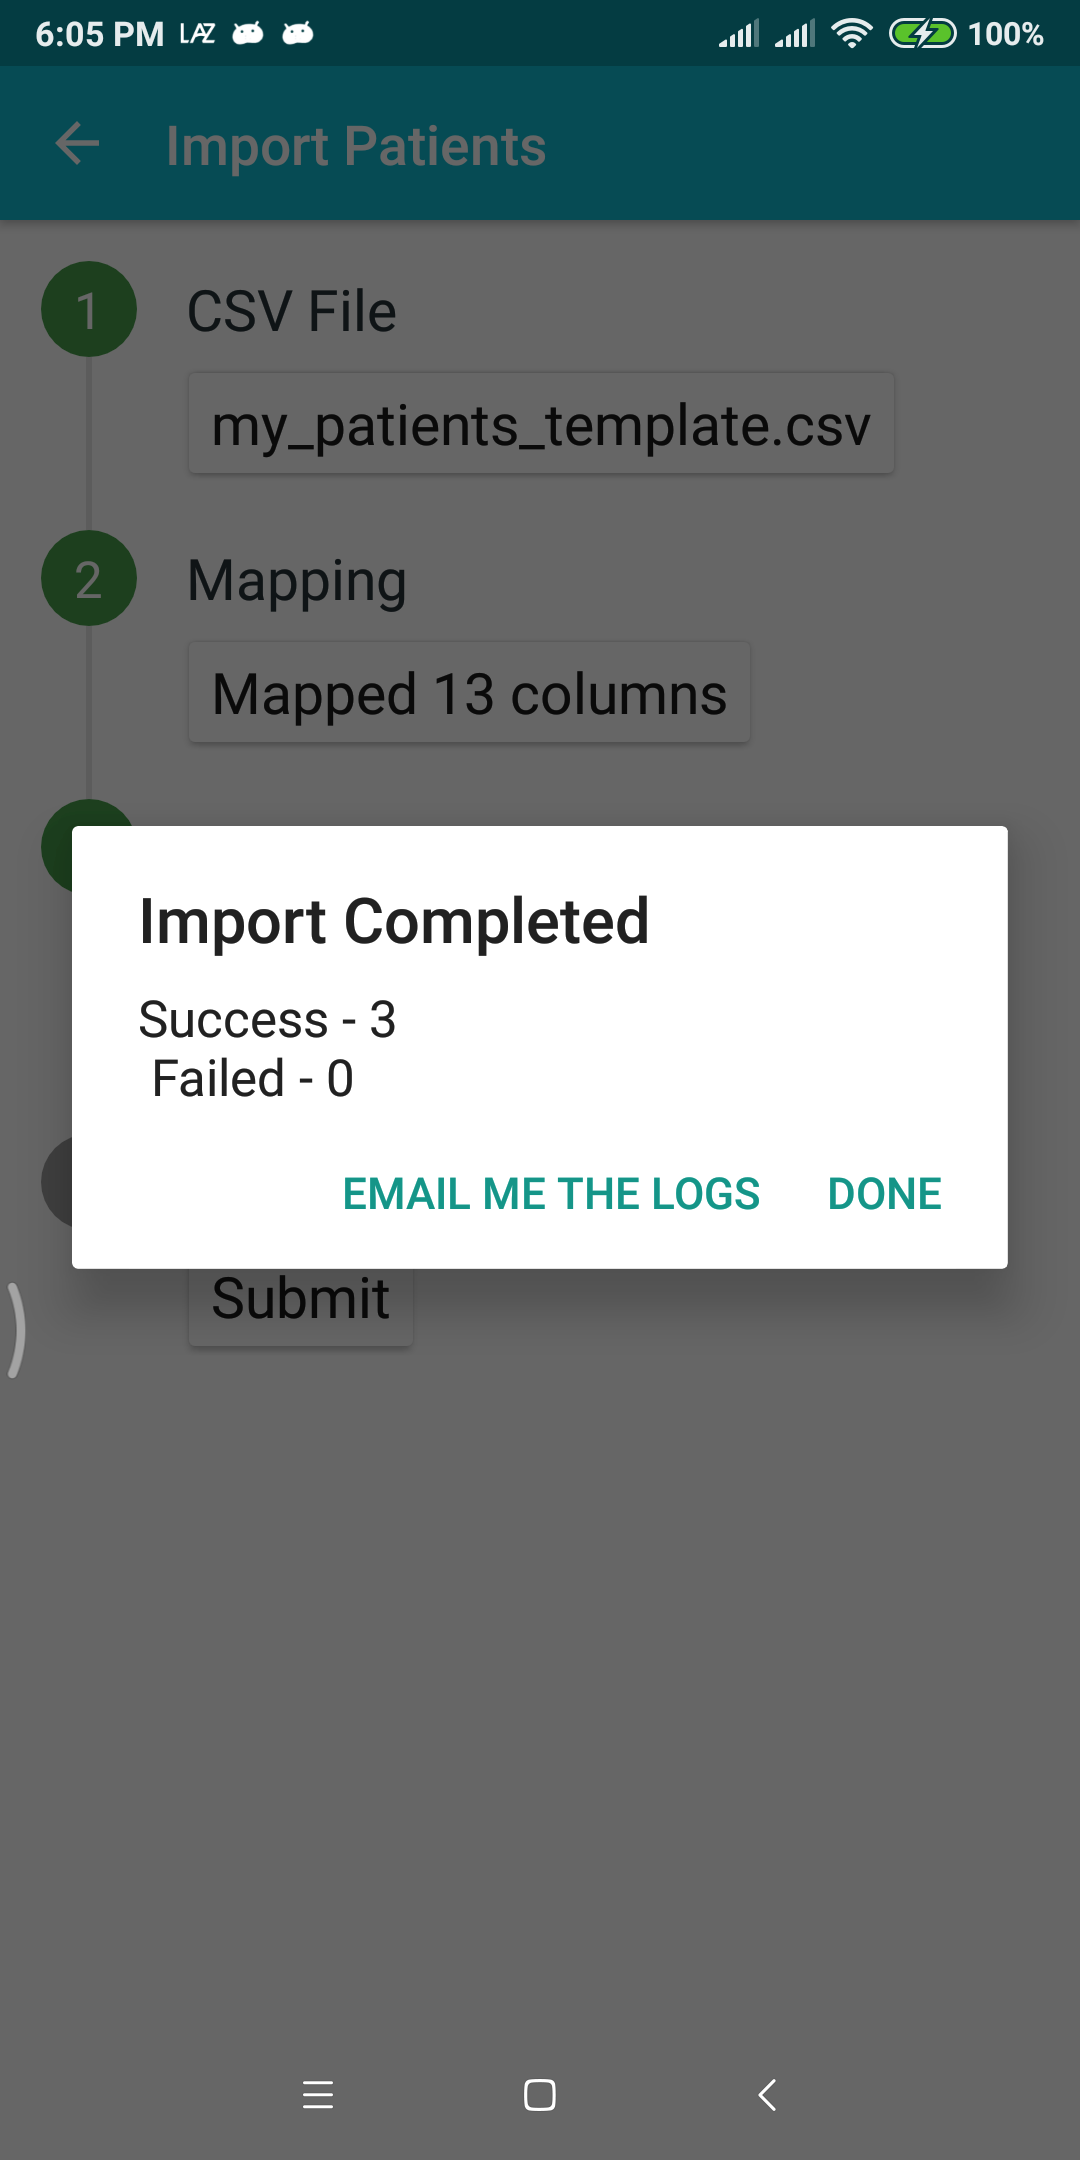
(12) Import is completed. It shows how many succeeded or failed to be imported.
If some failed, you can click on “Email me the logs” button to see what happened to each row on your import file. This will give you a clue on what went wrong.
Once you resolve the failed issues, you can attempt to re-import the failed rows only.
This is what the import logs looks like.
Success log includes all rows that were successfully inserted. The last column is the generated ID assigned for that patient record.

Failure log includes all rows that failed to be saved. You will see the failure reason on the last column.

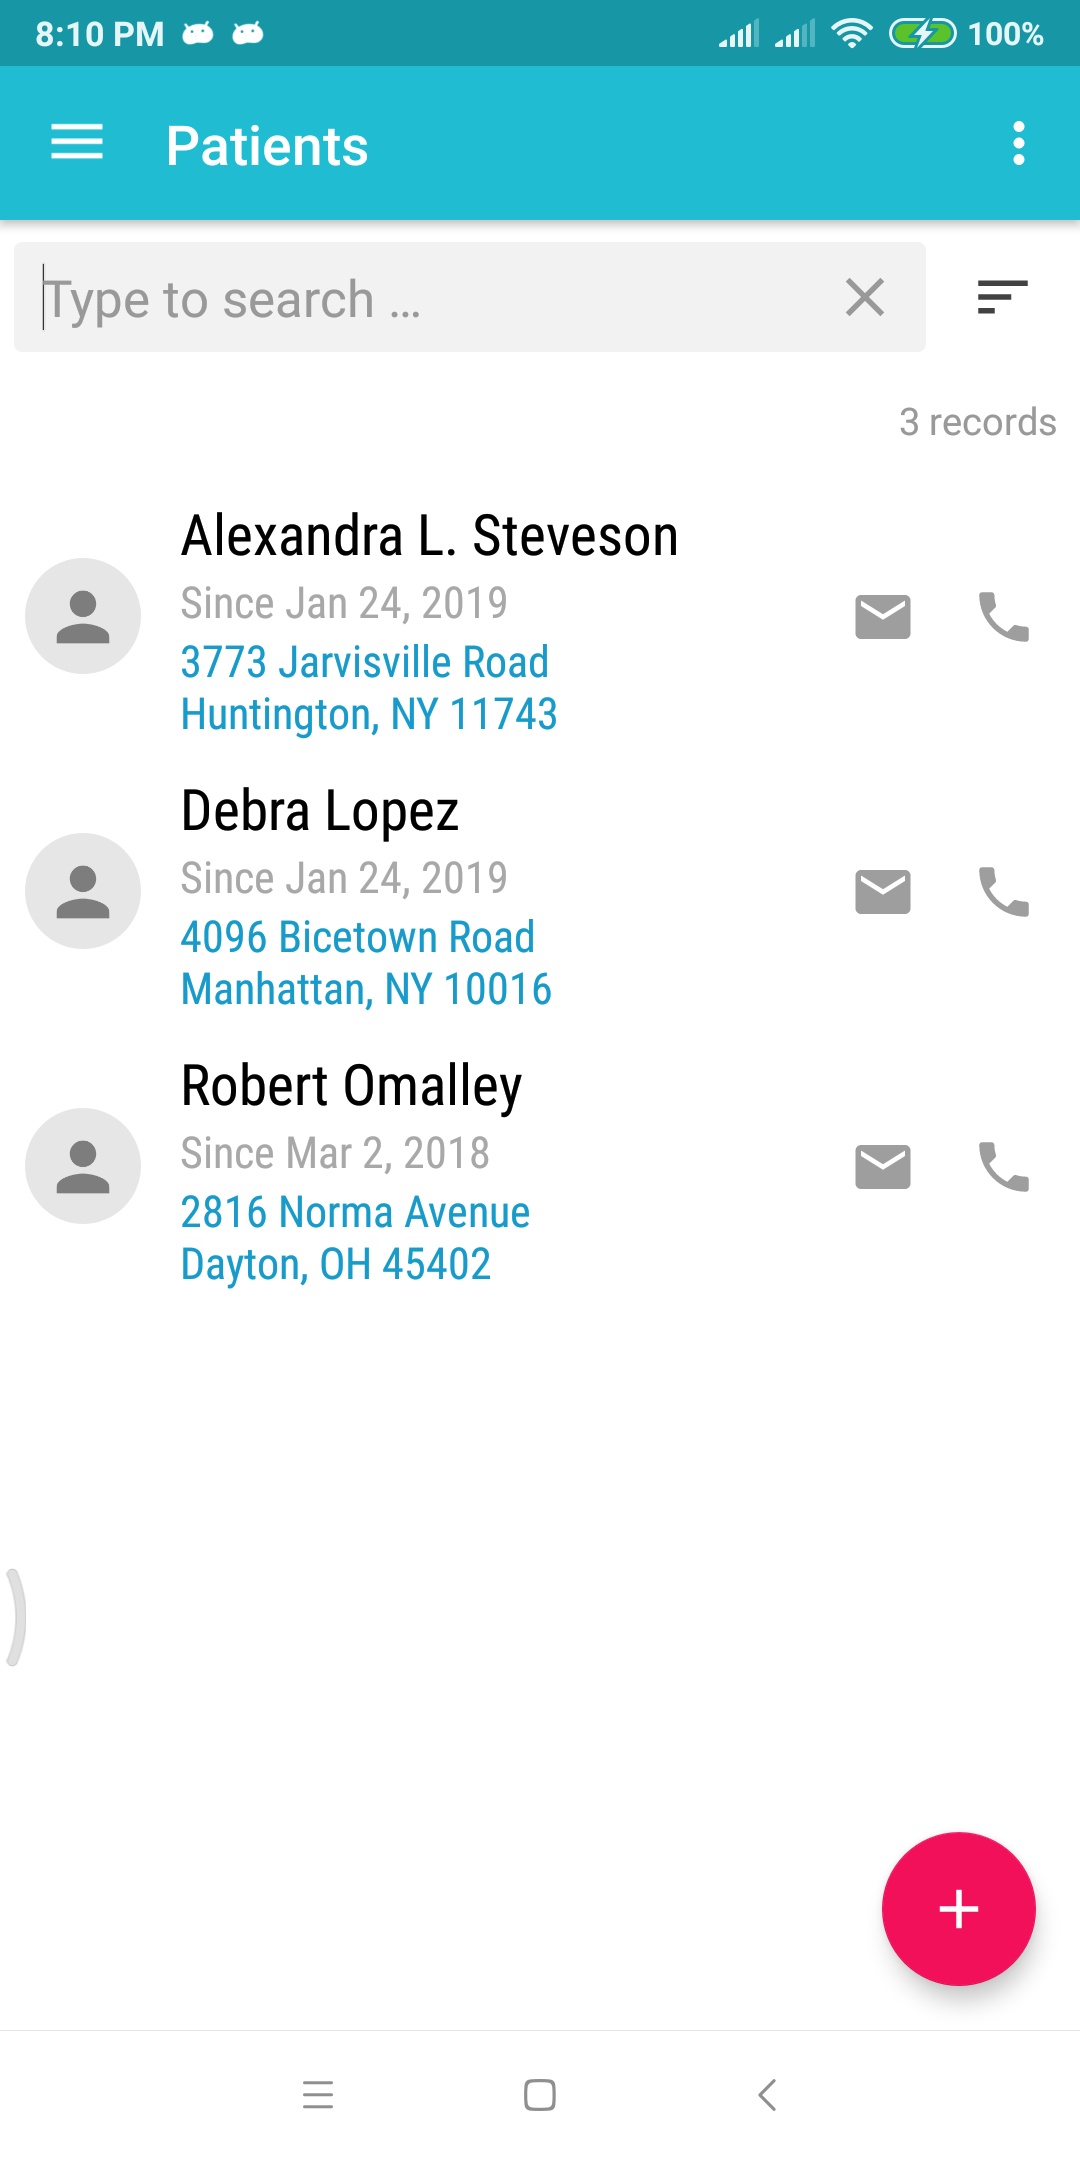
Finally, these are patients that were imported from the spreadsheet.